Many owners of suburban areas are faced with the problem of excess water. Basically, such problems arise with properties that are located in lowlands. But, areas on hills are no exception. This is especially true in the spring, when melting snow results in a lot of water that can flood the area. But the big problem is the flat areas. How to drain an area groundwater, if the water has nowhere to go. In this article we will try to give a detailed answer to this question.
Dehumidification options
A problem such as too much water personal plot, solved in several ways. So, you can change the composition or level of the ground. Planting plants that consume quite a lot of moisture can also be a good option. If there is no place for the water to go, then the problem is insufficient slope. Most often this issue is resolved with the help of imported land. So, the earth is scattered throughout the site in such a way that a slight slope is formed, sufficient to drain groundwater.
Planting moisture-loving plants is also a good option. It is worth noting here that in such areas it is undesirable to plant plants with a taproot system. In such conditions, the roots quickly begin to rot and the plant dies. Therefore, experts recommend paying attention to species with a fibrous system. Such plants will consume excess water, which will allow the area to dry out without much effort.
Drainage system design
So, if you have chosen the option of “leveling” the site with the help of earth, then you should think about the device in advance drainage system. It has a fairly simple structure. Therefore, everyone can equip it with their own hands. The main thing to remember here is that drainage pipes, which are most often used in suburban areas, must be located at a certain slope towards water drainage.
To begin with, a trench is dug, the depth of which is approximately one and a half meters. A sand cushion is poured onto the bottom. After this, geotextiles are laid. A drainage pipe is laid on top of it and filled with crushed stone. At the last stage, the earth is poured. The thickness of the earthen backfill should be about 30 cm. Thus, a simple drainage system is installed on the plot.
You might also like:
 How to line a toilet pit correctly, and with what materials?
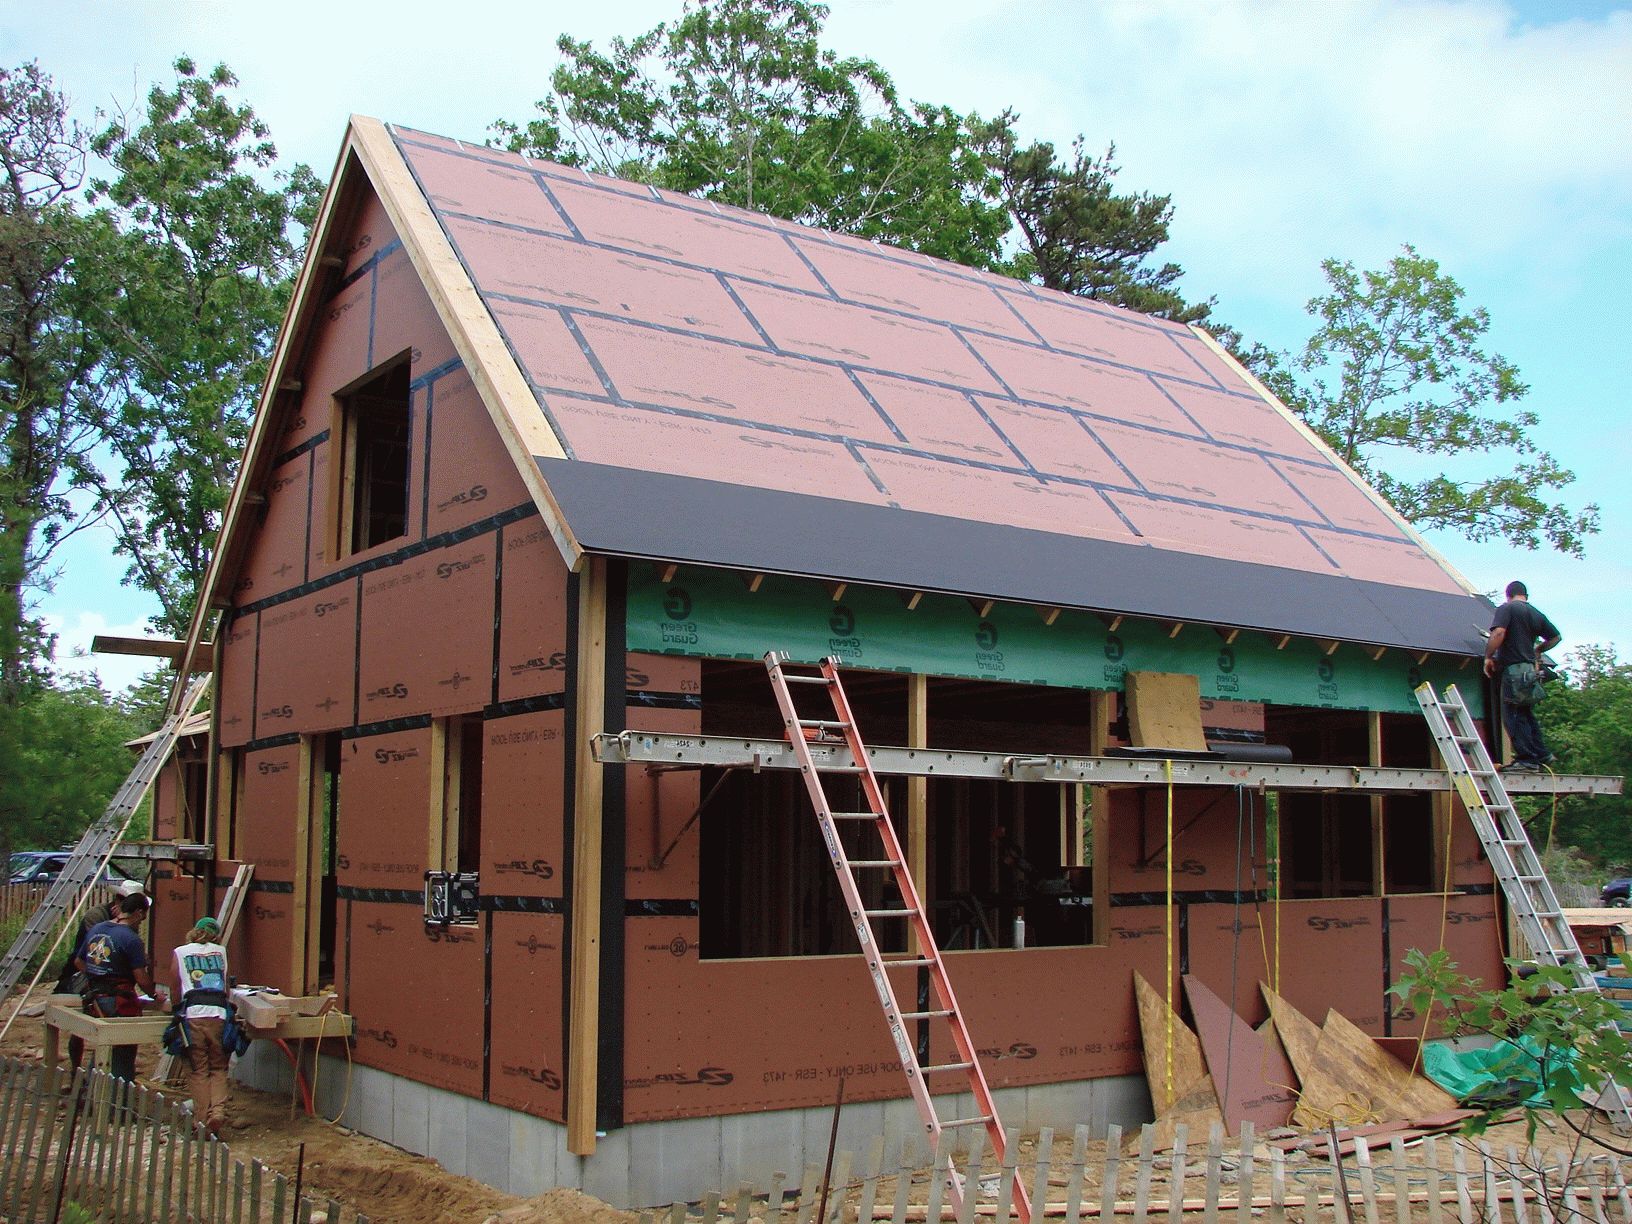
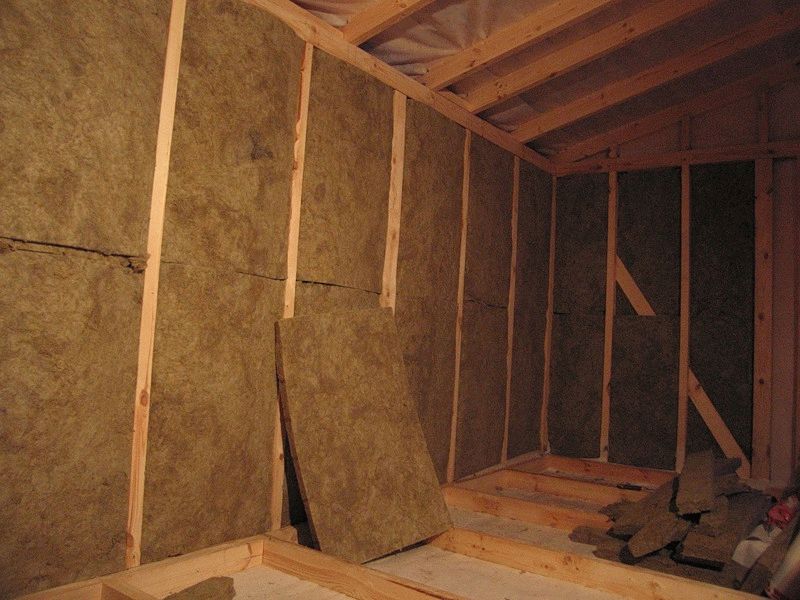 How to properly insulate an attic with a sloping roof and sheathe it?
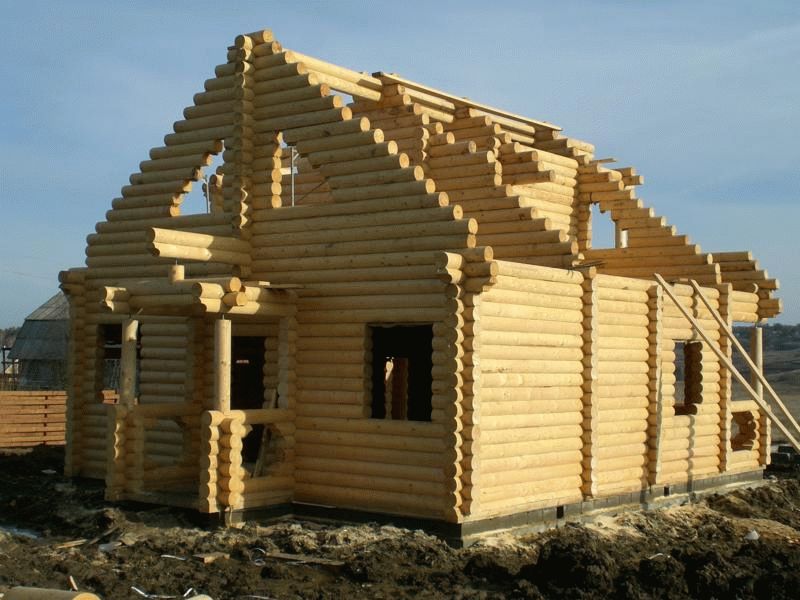 Is it necessary to treat (paint) a log house with an antiseptic, and what is the best way to do this?
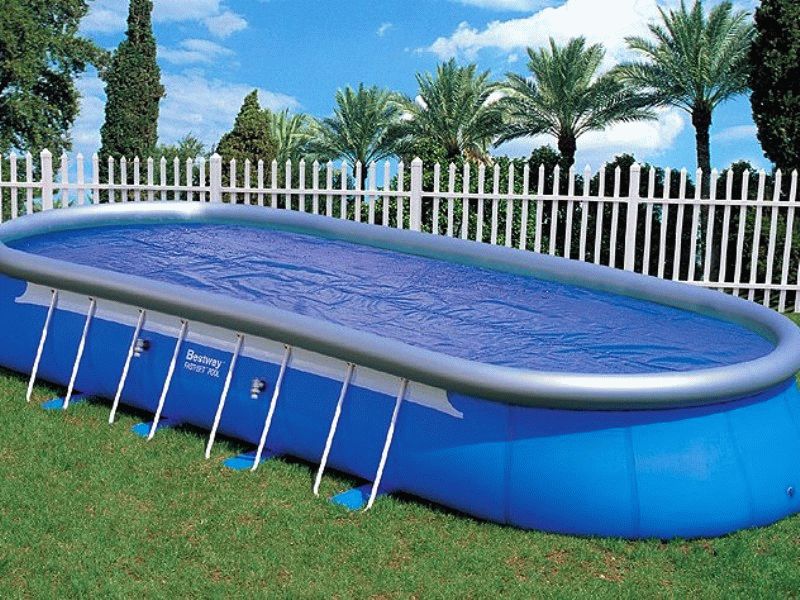 Which is better to choose: a frame or an inflatable pool for your dacha in 2016?
 When can you sheathe a house made of timber and how to do it correctly?
 How to line the walls in a bathhouse with eurolining?
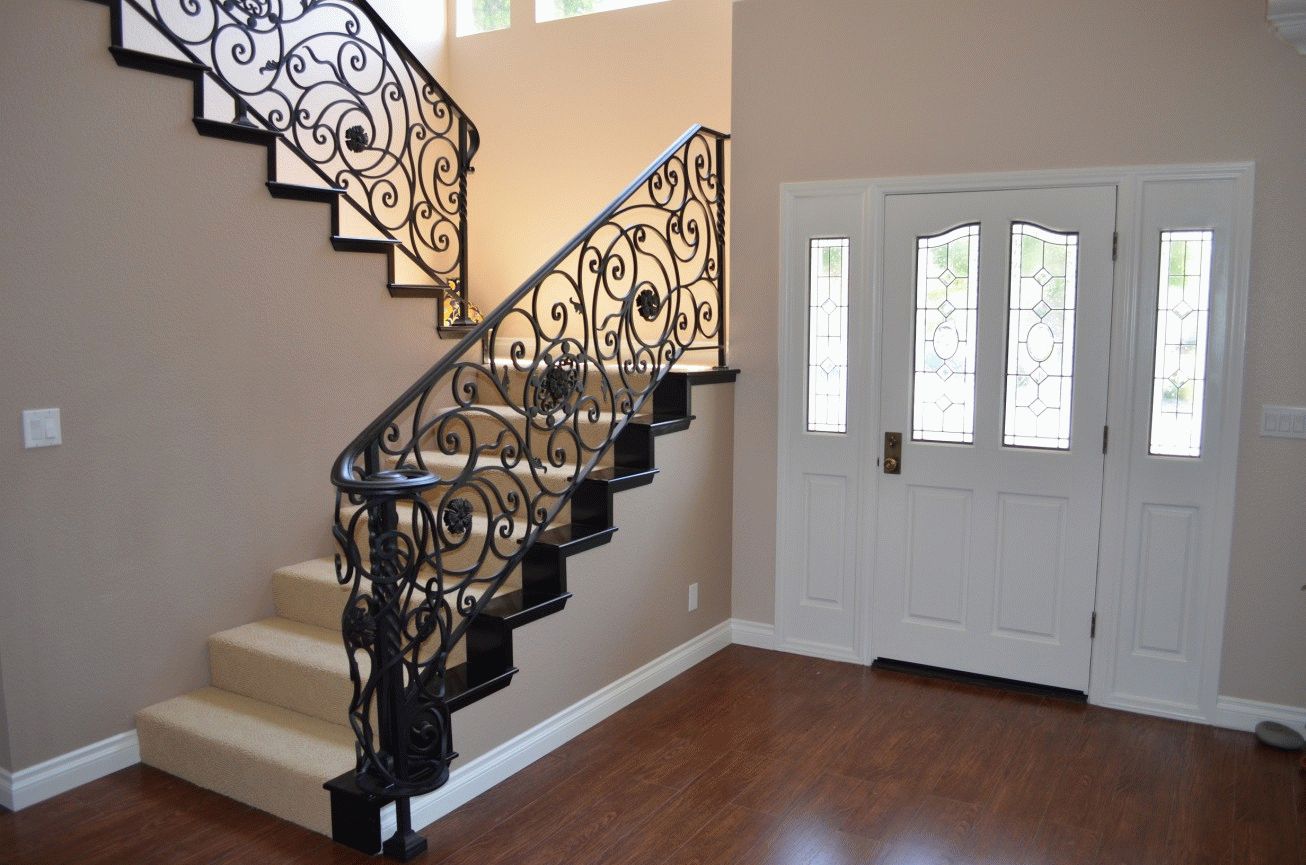 Which staircase is better, metal or wood - types of stairs
You may have noticed that after the snow melts in the spring, there is a “swamp” on your property for too long; when it rains, puddles quickly form, and water immediately appears in the dug holes. This phenomenon, observed quite often in connection with the climatic and soil characteristics of the Non-Black Earth strip of Russia, clearly indicates that your “hacienda” requires drainage.
Why do you need drainage?
Drainage installation is one of the most important stages in the development of a suburban area. You should not neglect it - in the future it may result in large expenses. In the absence of drainage on excessively moist soils, due to poor aeration of the roots, the growth and development of plants is inhibited, the foundation of the house may be destroyed and the basements will flood. Constant dampness in the area can lead to the development of fungal diseases in its green inhabitants - primarily this applies to trees and shrubs. It is quite possible to make drainage yourself. You can begin its construction as soon as the snow melts, but first you need to determine the reasons for the waterlogging of the territory.
Causes of excess moisture
The most common cause of waterlogging is excess subsoil water. This phenomenon is seasonal: in the spring after the snow melts or in the fall during the rainy season, the supply of moisture exceeds its consumption for evaporation, and it accumulates in the surface soil horizon. The situation is aggravated by the presence of heavy soils (clays or heavy loams) and a waterproof or low-permeable subsoil layer, which is generally a typical phenomenon for the Non-Black Earth Region. If your site is located in a lowland, then water from all over the area can accumulate on it. The second reason for excess hydration is
high level groundwater. Plants in such conditions can only grow until their roots reach the aquifer.
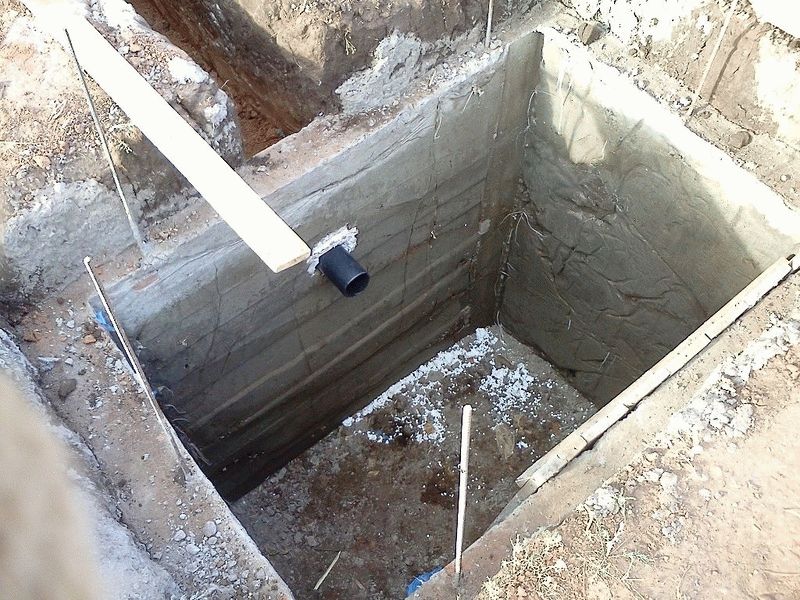
The simplest way determine the groundwater level in your area - dig a hole. It is best to do this in spring or autumn, when the groundwater level is at its maximum. Thus, an excess amount of water can enter your site with both precipitation and groundwater. Once you have determined “who is to blame” in your particular case, you can focus on the next stage.
What types of drainage are there?
Drainage can be open (regular ditches) or closed (trenches filled with drainage material or drainage pipes laid underground - drains). Open drainage is arranged to intercept water from the surrounding slopes or accelerate its flow on the site itself, and closed drainage is used to lower the groundwater level and increase the infiltration (permeability) capacity of the soil. In practice, a combination of these methods is usually used. The simplest and cheapest device is
open drainage. To organize surface water flow, ditches 0.5 m wide and 0.6-0.7 m deep are dug along the perimeter of the site - from them water flows into the street ditch. If the site is located on a slope, then such ditches are arranged across the slope. To intercept and drain subsoil water, deeper channels (dryers) are used - they are made 1-1.2 m deep, the walls are beveled at an angle of 20-30° for greater strength. Open ditches/channels must be cleared annually of debris and weeds that interfere with the flow of water. Species
closed drainage various - wooden, pole, fascine, stone, tubular. On peat soils, the most effective is wooden drainage, made from boards knocked together into a triangular or square box. Very cheap options are drainage from pine or spruce poles (pole poles) and bundles of brushwood (fascinine) laid at the bottom of the trench. In small areas, stone drainage works well - a trench half filled with stones or broken bricks and covered with gravel. In areas with deep soil freezing, this type of drainage is indispensable.
Types of closed drainage: A, B – wooden drainage, C – fascine drainage, D – stone drainage, E – tubular drainage.
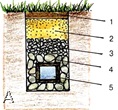

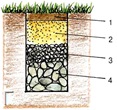
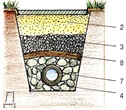
Materials indicated in the diagrams: 1. Soil, 2. Sand, 3. Gravel, 4. Coarse crushed stone, broken brick, 5. Box of boards, 6. Fascines, 7. Ceramic or plastic drainage, 8. Sod or geotextile
However, the most widespread
tubular drainage- ceramic (pottery) and plastic.
Pottery drains durable but fragile; have a length of 33 cm; come in different diameters (50-175 mm). Water enters the pottery drains through the joints (they are laid end-to-end, leaving a gap of 1-2 mm).
Plastic drains, having a corrugated perforated surface, are lightweight, durable, and also come in different diameters (63-125 mm). Water penetrates into plastic drains through joints and holes. There is another one
specific type closed drainage -
mole. No, this is not breeding moles for the purpose of making their tunnels underground to drain the area. Mole drainage is underground loose passages laid using special equipment. We will use this type of drainage only in very large areas. To solve local problems they use
local drains. For example,
ring drainage, laid around the house, is used to protect the foundation from high groundwater.
Storm drainage necessary to drain water coming through the drain from the roof of the building. Local drainages are used in combination with a general drainage system. For example, drainage intended for draining a path or patio with a hard surface is laid out with a slight slope (1:40-1:50) towards a shallow drainage ditch laid along the site.
Technology for laying drains for tubular drainage
To install tubular drainage, dig a trench (at least three drain diameters wide), and pour a layer of sand or gravel (approximately the thickness of the drain diameter) onto its bottom to the designed level. The bottom of the trench must have a uniform slope towards the water intake (the minimum slope is 3-4 cm for every 10 m). The location of drains maintaining a uniform slope is an important condition for good drainage performance. The depth of drainage depends on the mechanical composition of the soil and on the characteristics of the plants being grown: it is usually 1-1.2 m (the minimum depth is 0.7 m and the maximum is 1.5 m). Distance between drains (another
important parameter drainage system) also depends on the mechanical composition of the soil: the maximum distance on clay soils is 10 m, on loam soils - 20 m, and on sandy soils - up to 50 m. When draining sports fields, the distance between drains is reduced by 2 times. Most often, the drainage system has a herringbone shape. The central trunk (collector) collects water from the side drainage pipes (dryers) and directs it to a water intake - a street ditch, ravine or pond. If removing water by gravity is impossible (the water level in the water intake is too high), then in this case, at the lowest point of the site, a
drainage well(reinforced concrete rings are often used for this). The diameter of the drainage well is usually 1-2 m, and the depth depends on the depth of the collector mouth (but not less than 2 m). Water from the well is pumped out automatically when it reaches a certain level and discharged outside the site or used for irrigation. This is how land is drained in the Netherlands. Not everyone knows that the main purpose of the famous Dutch mills was not to grind grain at all, but to pump water from areas located below sea level.
Filters for drainage system
The main reason for poor drainage performance is silting: drains through joints and holes become clogged with silt particles washed from the soil and become clogged. Therefore, to increase operating efficiency and extend the life of drainage, various filters are used: organic (peat, moss, straw, coconut or flax fiber), synthetic (geotextile, glass wool) and mineral (sand, gravel, crushed stone). Bulk filter materials are used for backfilling trenches (trench filter), and fibrous filter materials are used for winding drains (volumetric filter). IN
recent years In connection with the advent of new synthetic materials, the technology of so-called soft drainage has become widespread. This technology is very simple: at the bottom of the trench there is a pile of large crushed stone, surrounded by a layer of geotextile, which protects the crushed stone from silting.
Other ways to deal with excess water on the site
In addition to installing a drainage system, a time-consuming and expensive task, there are a number of other techniques aimed at combating excess moisture. For example, a decorative artificial pond can not only serve as a decoration for a site, but also solve a very practical problem - namely, drain the surrounding area. Some well-known trees in our region are excellent natural drainers (these include birch, willow, oak, and maple). Planting these rocks on the site, as well as general soil filling (or at least planting
garden plants on the mounds) help prevent
harmful effects high groundwater. Having done it once
necessary work By draining your suburban area, you will forever get rid of the danger of turning your emerald lawn into a swamp, and your favorite garden into a breeding ground for mosquitoes.
Hello!
In the spring we purchased a gardening plot. Although it was already melting with might and main, there was no water on the site, so they decided that the site was located in a good place. There were no large trees on the site, but this was because they were simply cut down, leaving large stumps: birch, spruce and aspen. The entire area is covered with young growth, the same birches, aspens, and several fir trees. There were also rowan trees and even one wild fruit-bearing apple tree. Therefore, we concluded that it was definitely not a swamp.
Since we wanted to quickly uproot everything, we hired an excavator. Before that, they cut down everything that could be used for firewood. The excavator operator suggested this option - he drives into the area, pulls out all the stumps, digs a large hole in the corner, shovels the stumps there, fills the hole, levels everything - voila, a flat area. He argued that he had already done this many times, everything was fine.
Well, that’s pretty much how it all turned out, but not everything. The guy turned out to be quick, he didn’t wait for our arrival, but did everything alone. According to him, when he began to dig a hole for the stumps, water rushed into it. He still heroically dug it up and shoveled the stumps there. During this time, the soil began to get wet, the excavator began to get stuck, and the man decided not to tempt fate any longer - he left, leaving everything as it was.
The parents went to the site and were completely shocked by what they saw - everything was dug up, in the part far from the road there was a huge pile of clay, next to it there was a huge puddle, as they say, over the edge. The excavator operator agreed to come again and level the pile of clay; he did it, but not completely. In addition, getting back through the ditch from the road, he decided to “clean it up” and dug another hole in the place of the ditch. How it looks now - in photographs.
What we have now. The plot is 25 by 40 meters, a narrow part from the road. From the road south-southwest. Near the road there is a section about half a meter below the road, then the section gradually decreases towards the far edge. We didn’t measure it exactly, but somewhere around half a meter, or a little more. Neighbors on the left and right raised their plots, their plots were half a meter higher. The section next to us seems to have a gradual rise. So it turns out that our site is located in a local lowland, everything that surrounds it is higher and higher. In general, the terrain in gardening is not completely flat, for example, a few areas away from ours the soil level is noticeably lower, but it is quite dry there.
The ditch from the road is now wide and filled with water almost to the brim; there is no outflow from it towards the neighbors. There are no other ditches around the site. The fertile layer (what is left of it after the tractor) is about 20 cm, then yellow clay with rare small stones. Now, next to the pile of clay left after digging a hole for stumps, there is a huge puddle, I don’t know how deep it is, and I don’t know if the ill-fated hole is in its place.
What you want to get as a result: a leveled area, possibly with a slope, on which there will never be long-term puddles. It is planned to build a house for 4 people on the site. At the same time, there must be a fertile layer sufficient for a vegetable garden (parents cannot imagine a plot without a vegetable garden)
The hole with stumps is especially troubling. After all, in essence, the result is a large cavity filled with a loose structure, without drains. It will never be dry there. Maybe it makes sense to take out the stumps from it, fill the hole with clay, and then top it with fertile soil?
And if all the neighbors raised their plots, it turns out that we also have no choice but to raise ours?
Sorry for the long presentation, I just want to get valuable advice on how to improve the situation.