If we describe in a few words what it is, we can say the following: this is furniture, the basis of which is bodies made of sheet materials. At least, that’s how I understand this term (by the way, I looked on Wikipedia and couldn’t find a definition).
This furniture can be made from chipboard, plywood, MDF, wood and other similar materials.
But, as you know, in the vastness of the former USSR, the most popular semi-finished product (for this type of furniture) is chipboard, or, to put it more correctly, laminated chipboard (laminated chipboard).
Although it is said to be “a little” harmful (I mean the pharmaceutical resins included in its composition), it is still quite popular (unlike, for example, the West), considering its price.
IN major cities, where the standard of living is relatively high, elite (expensive) furniture has long been made from MDF (it has many advantages compared to the material we are considering), but, nevertheless, in general, chipboard is the leader in use in furniture production.
As mentioned above, chipboard is a material that chips heavily, therefore, in order for the product to be disassembled and assembled a certain number of times (for example, for transportation), minifixes must definitely be used to connect its components, since confirmations They will simply crumble the joining holes, and after the next disassembly, it will simply be impossible to assemble the structure (you will need to drill holes in another place to tie the parts together).
Also, another weak point of the material in question is the fastening of fittings (guides, hinges, etc.).
Having secured the fittings once with a self-tapping screw (and all fittings are attached to chipboard parts with self-tapping screws, usually 4x16, 3x16 (mm)), it is better not to unscrew them, since the same process of chipping of the material occurs, and this fastener (screw) will no longer work Fix this fitting firmly to the surface of the part.
Here, in general terms, is an overview of the nuances related to making furniture with your own hands from chipboard.
You can’t write everything in one article, so I’ll end here.
See you in new articles.
The cost of laminated chipboard furniture assembled at home does not exceed 50 - 60% of the store price of the finished product. Is this really so and what do you need to know to get such a significant “discount”? I’ll try to understand all the intricacies and features of making furniture with my own hands using my own experience as an example.
How to avoid mistakes in furniture making
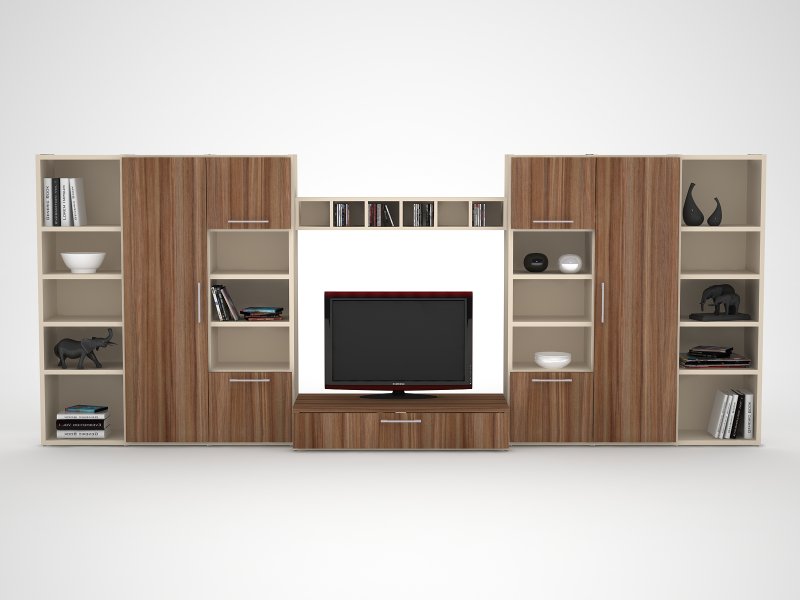
For the first time, the thought of self-production furniture, visited me in an Ikea store about 10 years ago. Considering the options for furniture for the living room, I stopped at one of the “walls”, which looked quite decent and had the functionality I needed. It suited me according to its size, having the right length to stand in my home. Its color scheme suited the overall style of the interior, and the design stepped far ahead of Romanian furniture from Soviet life, but not so much as to become a kind of decor that lost one of the properties of furniture of this type - to be, among other things, a place for storing things. That is, my choice was by no means a similar option:
But no matter how good that wall was, it categorically did not suit me for the price. If I’m not mistaken, then for the complete set they asked for about 53 thousand rubles, which for 2005 was a very significant amount. Here it is worth clarifying what “full set” means. In the Ikea store, furniture is sold in the form of a construction set, consisting of various elements and allowing you to buy any fragment separately - at least one shelf, at least one drawer.
It was precisely the peculiarity of this form of sales that prompted me to think about the possibility of significantly reducing the cost of purchasing furniture. Having carefully examined the exhibition sample internal structure walls, I came to the conclusion that I can make the “box” itself, that is, everything that is hidden behind the facades, on my own. In Ikea, I will only buy doors, glass, fittings and drawer fronts, and then the terrible 53 thousand will turn into a wonderful 25 thousand + material for making the insides.
Since I had come across the laminated chipboard material and imagined how much it cost (at that time less than 1 thousand rubles per sheet at retail), my plan seemed to me just a super idea, and the prospects of filling the apartment with new furniture at ridiculous prices loomed in my mind.
It’s curious that at that moment I didn’t think at all about the methods of connecting parts, calculating mounting holes and installing fittings, and all that worried me was how I would deliver the chipboard to the apartment. For myself actual problem I saw sheets of format 2800*2070*16, each of which weighs about 65 kg, being carried onto the 4th floor. I even thought about delivering the chipboard to the entrance and cutting it myself right on the street... In general, now I even regret that I did not implement this “brilliant idea” back then. Purely for photos. Well, laugh about it, whatever...
It is quite obvious that the approach was wrong and should not be done this way. What did I do this time and in what order? Firstly, by the 2010s, the RuNet was filled with a large amount of information, including sometimes useful information. I drew all the instructions and solutions from him, since I simply don’t have any friends in Perm with whom I could consult regarding furniture.
The second and most important thing is the presence of companies specializing in the sale of components for furniture assembly. They also provide services for cutting laminated chipboards to specified sizes, edge processing and delivery. Working with these companies is the basis of economic benefits for the home craftsman. In a nutshell, for example, a cabinet designed independently and ordered in the form of separate parts from a similar company, then assembled at home with your own hands, will cost half as much as buying a ready-made one.
Theoretical foundations
As far as I know, from 2006 to the present day, the only person who has made an attempt (very successful) to transfer his knowledge about creating cabinet furniture into the sphere of information business was and remains Andrei Lappo. His brainchild KMSR 2 (do-it-yourself cabinet furniture) is a textbook teaching aid in this area and allows anyone who has studied to make furniture themselves. This has been tested by thousands of users and it works!
Even though the course was recorded several years ago, its relevance will not disappear for a very long time. It's like writing a tutorial on brickwork- it doesn’t matter when it happens in 1915 or 2015, new materials appear, but the principle remains unchanged. I highly recommend this manual as a very good start.
The second most important source of information can be a specialized forum. In its vastness you can find answers to almost all your questions about creating cabinet furniture. But if, for example, you have no idea how two parts are connected, then you should not try to figure it out with its help. Therefore, first, basic knowledge with the help of Andrey Lappo’s course, then clarification on the forum.
Furniture design software
The computer programs that exist today for the design, calculation and visualization of furniture can satisfy the needs of the home craftsman to large industrial production. There is no need to study them in search of the optimal one, much less acquire one, at the initial stage. There is a proven, translated and well-researched program that is suitable just for our case. It's called PRO100, and even the name itself seems to hint that to use it you don't need to be a programmer or an advanced IT specialist.
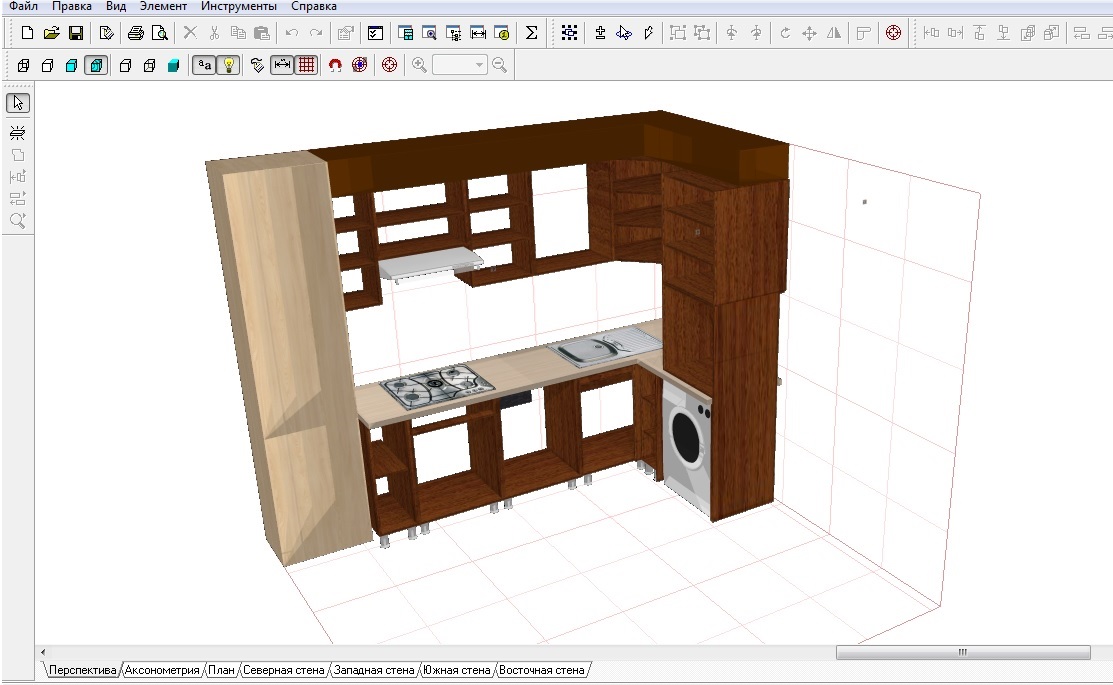
In order to start using it, you just need to read the manual, and to master the techniques of quick design from standard elements, just watch a couple of lessons that are widely presented on YouTube. Of course, the program’s capabilities are very diverse, but basic skills are enough for home use. If I'm not mistaken, it took me less time to learn how to use it than to find where to download a good, working version.
There is a certain percentage of people who, due to many years of habit, find it more convenient and easier to make sketches and working drawings on paper. This does not in any way affect the quality of the future product, since the main thing is only the mathematical accuracy of the dimensions.
I am of the opinion that the time spent on mastering the program is more than compensated by the convenience and speed of creating subsequent projects. And the possibility of 3D visualization clearly speaks in favor of the program.
Tool
The most pleasant thing is that the furniture is assembled with a minimum set of tools. If you have to purchase something specifically for these works, it will be a very insignificant cost in comparison with the savings obtained by refusing to purchase finished products.
In fact, the main tool is a drill. Moreover, it is advisable to use a drill rather than a screwdriver (although it is easier to perform some operations with it) - due to the difference in technique. The electric drill must be reversible, preferably with variable speed and devoid of delusional excesses such as “blow”. Fits comfortably in the hand, with a power of 350-500 W and not too heavy.
Other power tools you may need: a jigsaw, hand router and a circular saw. But these devices are necessary for isolated cases and can easily be rented.
Measuring tool - tape measure (with normally readable divisions), metal ruler, square and building level (600 mm is enough). Vernier calipers are very convenient in a number of cases.
Plus, you will need high-quality drills, countersinks, an L-shaped hex key (or asterisk) and other various small things, which can be purchased at one time, having previously written out the entire necessary set for yourself. But there is one device that is very important and affects the entire assembly process; unfortunately, you can’t just go to the store and buy it. We are talking about a template (conductor) for drilling holes for connecting elements, that is, for confirmations:

The conductor's task is to ensure that holes are drilled at a given distance from the edge of the part and, no less important, to do it strictly vertically relative to the plane. It seemed to me that this would not be difficult for me - to mark and drill laminated chipboard without deviation from the vertical, I can do it without a jig... Understanding that drilling without a jig is only suitable for a small number of connections (when the costs of purchasing or manufacturing it are not justified ), I continued to suffer. Don’t repeat my mistakes and immediately start looking for how to provide yourself with comfortable working conditions, that is, find a convenient conductor.
There are several options:
1. Buy a “branded” conductor, factory-made. There are probably more minuses than pluses here - quality product from a renowned manufacturer costs so much that it casts doubt on the very idea of making furniture for 50% of the store price. And simplified Chinese versions will not provide the required accuracy and reliability in operation.
2. Purchase a device made by our craftsmen. Enthusiasts with access to metalworking machines create high-quality and well-designed products from the point of view of ease of use. You can find advertisements for sale, for example, this is what the search showed:
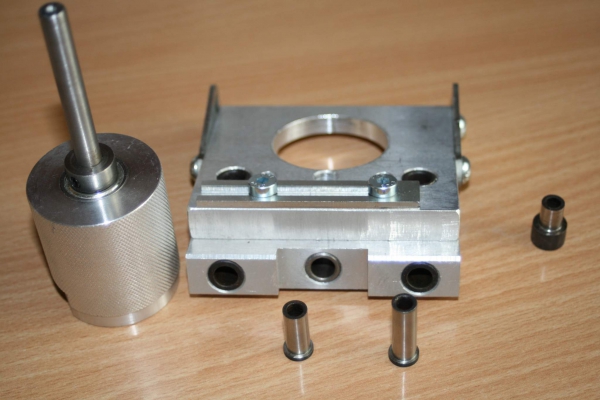
This is a universal jig that allows you not only to drill holes for confirmations, but also for minifix, rafix, TAV and door hinges. It is clear that such a product is aimed primarily at those who are engaged in the manufacture of furniture for on an ongoing basis. Although even for assembling furniture for one apartment, it will pay off and save you from numerous mistakes. And selling such a tool when it is no longer needed is not a problem.
3. Homemade conductor. A huge variety of options have been developed, from the simplest devices made from three pieces of laminated chipboard to universal and multifunctional ones. Look on the forum at the experiences of other users, there is plenty to choose from.
Whatever option you choose, it will be much better than working without using a conductor at all!
About saving
“All this is good, I realized that first it’s best to study the theory from Lappo’s course, then study the forum, study PRO100 and go order cutting from one of the offices in the city. And finally, start assembling furniture for yourself. But how about the money? Is it really twice as cheap? - the reader asks a question. I answer - indeed, the price in the store and the cost of the materials necessary for the manufacture of a similar product differ by two times.
True, you will have to work as a designer, designer, technologist and assembler. At times he worked as a loader, electrician and plumber. Scary? I think not, it’s even interesting. Actually, the difference of 50% from the finished product is your wages as a temporary representative of these professions. In addition, you receive furniture that is designed specifically for your apartment, calculated according to size and your individual preferences, exactly color scheme and with the accessories you wish.
Make a kitchen with your own hands, starting with design kitchen set and ending with installation and connection of built-in equipment - not the easiest task...
Particle board (or chipboard for short) was invented in the USA in 1940. Initially they were used for the construction of temporary houses. Gradually, production technology improved and production volumes increased. Over time, chipboard became the main building material for creating furniture.
The advantages of hand-made chipboard furniture
Every person wants his home to have furniture that is comfortable, beautiful and multifunctional. Certainly, finished assembly can be bought in the store. At the same time, the price for it will not be cheap, and the quality is not always satisfactory. After all, there are many nuances that are hidden and not visible at first glance. This is not a reason to be upset, because there is always a way out. Possible option- make furniture with your own hands from chipboard. The cost of products made by hand is certainly lower than the same factory-made items, and the savings on the family budget will be significant. You can also get satisfaction from the work process by creating unique and practical furniture with your own hands from chipboard.
The most popular material for making furniture
The most common material for furniture installations is particle board (chipboard). It is used mainly in the furniture industry. Of course, when creating furniture with your own hands from chipboard, you can find both pros and cons in this work.
It all starts with purchasing sheets of material. The first problem that arises is delivering them to the place of work, since they are quite large in size. The second point is cutting the sheets to the required sizes. The process itself is quite labor-intensive and dusty. When sawing the material, you should carefully ensure that no chips form on the edges. Cutting can be done at home or you can resort to the services of specialists who will help you carry out the work on format cutting machines. In addition to chipboard sheets, wood fiber raw materials from natural wood, as well as bamboo boards and rattan are used to produce furniture.
from chipboard
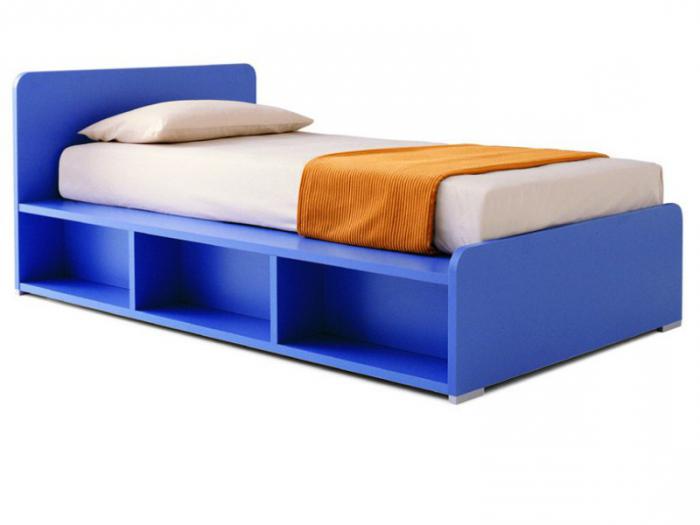
One of the main pieces of furniture, of course, is the bed. Even a non-professional carpenter can create such a home interior object. It is important to know that the thickness of chipboard for bedroom furniture should be at least 2.5 cm, since the weight of a person will affect the bed. Planed boards and bars are also required for creation. We will describe below how to process chipboard edges.
Now let's look at how to assemble the entire bed into one unit. First, we assemble a box in which we create holes for ventilation. During the work, we install the bars, the upper edge of which should be along the contour of the box, and tighten them using wood screws. We use the planed board to make stiffening ribs and install them under the beams. At the end of the work, the central block is mounted using glue and self-tapping screws.
How to process chipboard edges
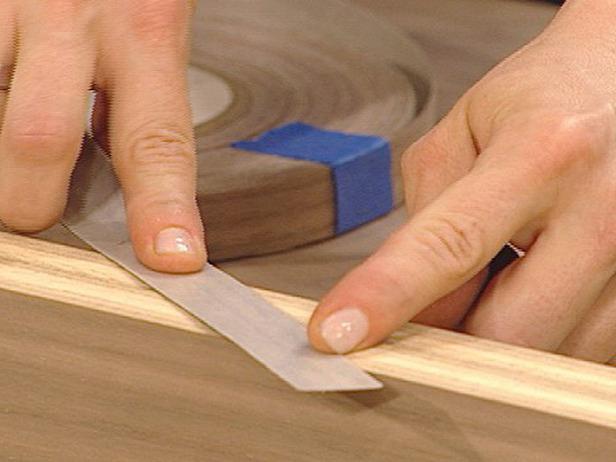
Before making a mark and starting to assemble parts of the furniture installation into a whole aggregate object, it is necessary to process the edges of the sheets wood boards. To paste them, use special glue on one side of the tape, that is, it is almost ready for use. According to the technology, the edge needs to be processed using an iron, slightly heating the top layer of the strip. In this process, you need to be careful and monitor the temperature of the device. If it is high, the glue on the tape may boil away, and if it is insufficient, the edge will not have time to adhere to the sheet.
The thickness of chipboard for furniture can be different. The optimal option for a bed, as already mentioned, is 2.5 cm. After gluing the edges, it is necessary to cut off the protruding edges. To do this, you can use a regular stationery knife and a sheet of paper. Moving in one direction, cut off the excess tape. After this, we use sandpaper and complete the process of processing the edges by erasing the corners. In furniture that is sold in stores already assembled, the ends that are not visually visible are not glued. It is advisable to treat all edges, as water may get into them. Then the material will begin to delaminate. You need to use silicone sealant, covering the hidden edges.
Correct marking and alignment of holes on chipboard
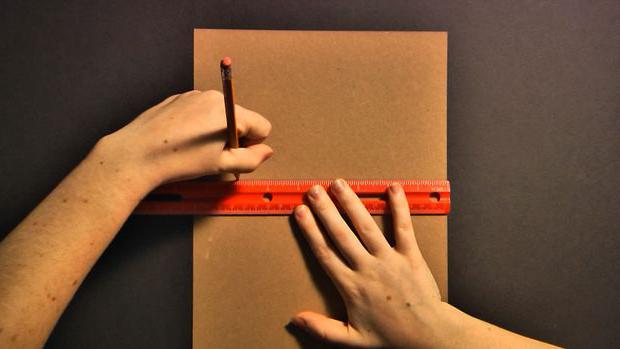
Correctly marking and centering the holes is a very crucial moment for the future appearance products. You need to mark all the points - both for connecting sheets and for curtains and handles. A homemade tool will help you make marks more accurately and quickly - a wooden ruler attached with one side to the rail at a right angle. Before using it for work, you need to make small holes on it (for the pencil core) according to the sizes that are often used. To connect the sheets, you first need to mark the centers for the holes on both sides, and then use a Euroscrew to fasten them into a single whole.
Connecting parts
Making furniture from chipboard is a rather complex process that involves joining many parts. Several methods are used for this. The most common ones are:
Butt connection.
- “Swallowtail”.
In order not to complicate the work, we will consider a simple method of butt mounting. With this connection, the edges of the material are fixed with glue and various fasteners. This method can hardly be called durable.
The same is true for a mustache connection. It also requires an auxiliary mount. In this case, the connection occurs end-to-end with a beveled end at an angle of 45 degrees.
More durable and the easy way You can combine the parts with a seam connection. They can be fastened into grooves lengthwise or crosswise; the difference lies in the direction of the wood fibers towards each other. A seam connection can be distinguished from others by the ledge that runs at a right angle on the edge of the board.
Installing drawers using guides
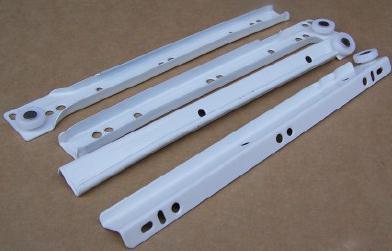
Exists large number various guides used during installation. They facilitate their movement in the structure. With intensive use, only a metal roller can guarantee smooth running and durability.
If you make furniture with your own hands, photos of samples and varieties of drawer rollers will come in handy. They will help you decide. Once you have chosen a track system, you need to install it on the drawer and in the cabinet. For fastening we use hardware, which usually comes with the rollers. If they are not available, you can choose your own size. The main thing is that after installation the screw does not stick out beyond the edges of the roller, but is flush.
Also, do not forget that the guides have round and longitudinal holes. The installation begins with the longitudinal ones, since with their help we can achieve the most correct position. Once adjusted, fix it through the round holes.
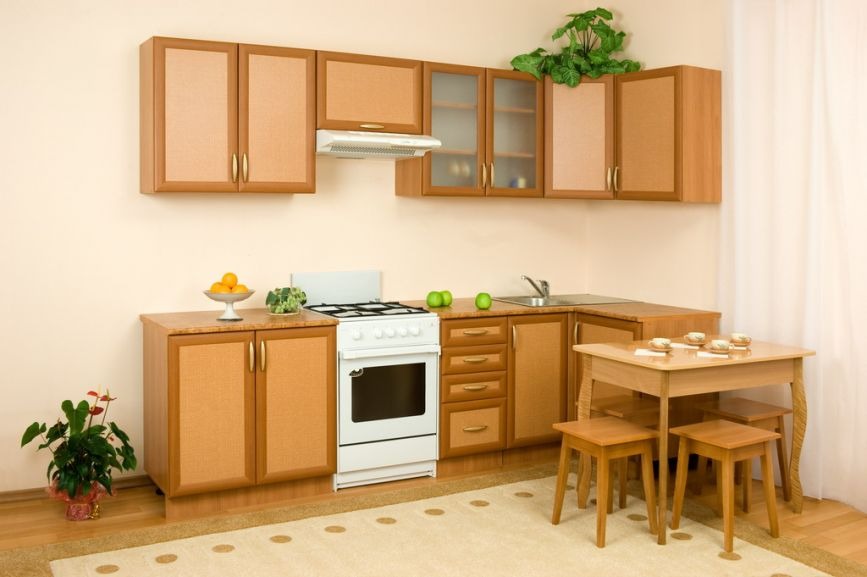
How to make kitchen furniture with your own hands from chipboard
Creating a project yourself kitchen furniture, you can make one that will harmoniously fit into a given area and be convenient for the owners. The price of such a kitchen set will be almost half the cost of creating it in production. When starting a design, you first need to take correct measurements. If you complete the correct drawing based on the data received, it will not be difficult to make furniture with your own hands.
Drawings are the basis of any work. They must take into account the work surface, hob, sink and everything that is necessary in everyday life in the kitchen. Some people believe that drawings of chipboard furniture are not needed. However, they will help you do everything accurately and avoid mistakes when creating products. After determining the drawing, we cut the material, process the edges and connect the parts. This process has already been described above.
Already long time The basis of cabinet furniture is chipboard (chipboard).
Today, many craftsmen make furniture from chipboard with their own hands, since the process technique is not very complicated.
Today, many craftsmen make furniture from chipboard with their own hands, since the process technique is not very complicated
For those who have an idea of how to use a minimum set of carpentry tools and materials, and are also familiar with the basics of reading blueprints, making furniture from chipboard with your own hands will significantly save your family budget.
In this case, the result of the efforts will be the creation of an exclusive and cozy interior of the apartment. All necessary materials can be ordered and purchased in specialized stores, and step by step video Instructions on how to build furniture from chipboard with your own hands can be found on the Internet.
Chipboards occupy a special position in the furniture market. This material is popular among the population due to its low price and practicality.
Chipboard is made from recycled wood, to which various resins of synthetic origin and additives are added to improve the quality of the material. All the above components are mixed, processed and pressed to produce a dense sheet.
Finished layers can be of various sizes, and their thickness is from 10 to 38 mm. Laminated chipboard is made from high-quality chipboard sheets. This is what is used for the production of various interior items.
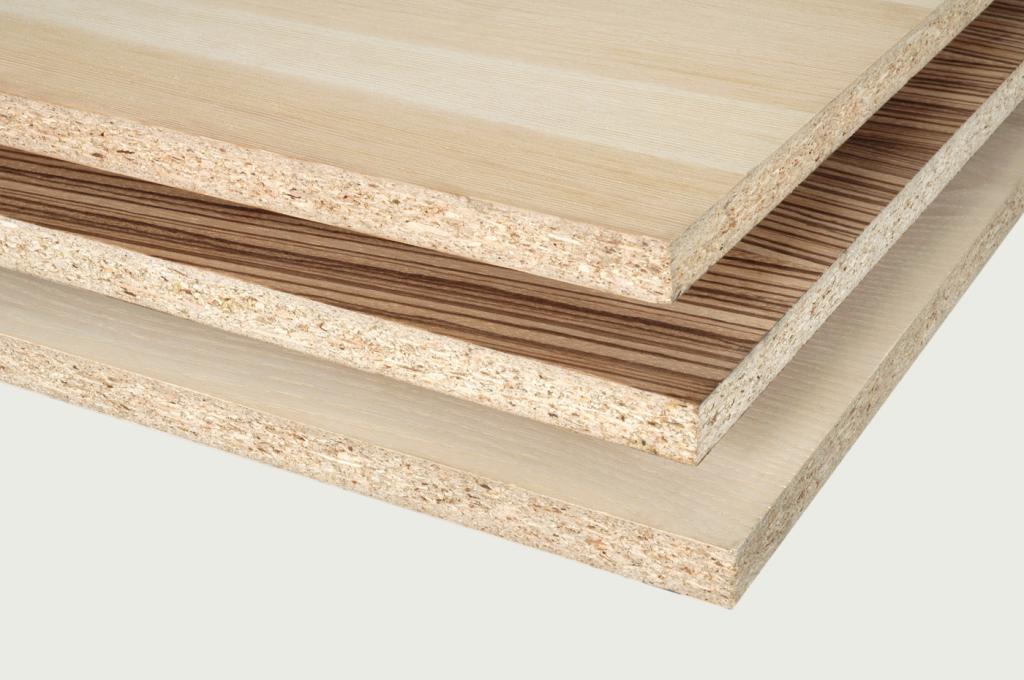
Finished layers can be of various sizes, and their thickness is from 10 to 38 mm
Note! Today, chipboard is used for the production various types furniture, its cabinet and façade components.
A variety of decorations for facing materials makes it possible to choose required material depending on individual tastes and style.
It should be noted that one of the disadvantages of chipboard is its instability to high humidity.
It should be noted that one of the disadvantages of chipboard is its instability to high humidity. In addition, the laminated surface of the finished boards requires careful handling, as it is very easy to damage or scratch. That is why it is necessary to provide appropriate storage conditions for such material.
How to make furniture from laminated chipboard yourself?
From chipboard you can make boxes, table tops, various open elements and the furniture itself with your own hands. Installation takes place in the form of assembling ready-made sheets, which can be purchased in specialized stores and trading companies. The color range today represents the widest choice, usually imitating natural wood.
From chipboard you can make boxes, table tops, various open elements and the furniture itself with your own hands.
The main stages of the process of making furniture from chipboard with your own hands:
- First of all, you need to buy the right amount of material - ready-made sheets of laminated chipboard. Such layers are adjusted to the appropriate size of future furniture by sawing, but before this the chipboard sheets should be “overtaken”. The process of “overtaking” is the cutting of a small part of the material along the entire perimeter of the sheet, about 5-10 mm. Such actions are performed to remove all kinds of chips that may occur during transportation of the material. Sawing of laminated boards is carried out using hand saw with fine teeth. You can use a circular saw or jigsaw.
- After the chipboard sheets are adjusted to the required dimensions, they are assembled. For this, the master will need confirmations, metal corners, minifixes and other fasteners. All fittings are attached to chipboard sheets using self-tapping screws.
Before assembling furniture with your own hands, you need to make drawings. This way you can avoid errors in assembly and count the required number of different parts - corners, confirmats, ties, euroscrews.

Chipboard fastening diagram
It should also be noted that than larger size future product, the more reliable the mounting angles should be, so it is better to give preference to metal ones; plastic ones may not withstand the weight of the parts and break.
All corners are fixed using self-tapping screws. To do this, you need to attach the parts to the fastening points and mark the entry point of the self-tapping screw with a pencil.
Important! Craftsmen can be helped by special programs that will design future furniture from chipboard and draw up drawings for making it themselves.
How to properly repair furniture made of laminated chipboard?
Products made from laminated chipboard have an excellent appearance and are low in cost. That is why such furniture occupies a leading position in the market. During operation or during transportation, products may be damaged and lose their original appearance. The advantage of this material is that it is easily restored. How to properly repair chipboard furniture with your own hands?

Wax for repairing furniture made of laminated chipboard
The following damage may occur:
- scratches;
- dents;
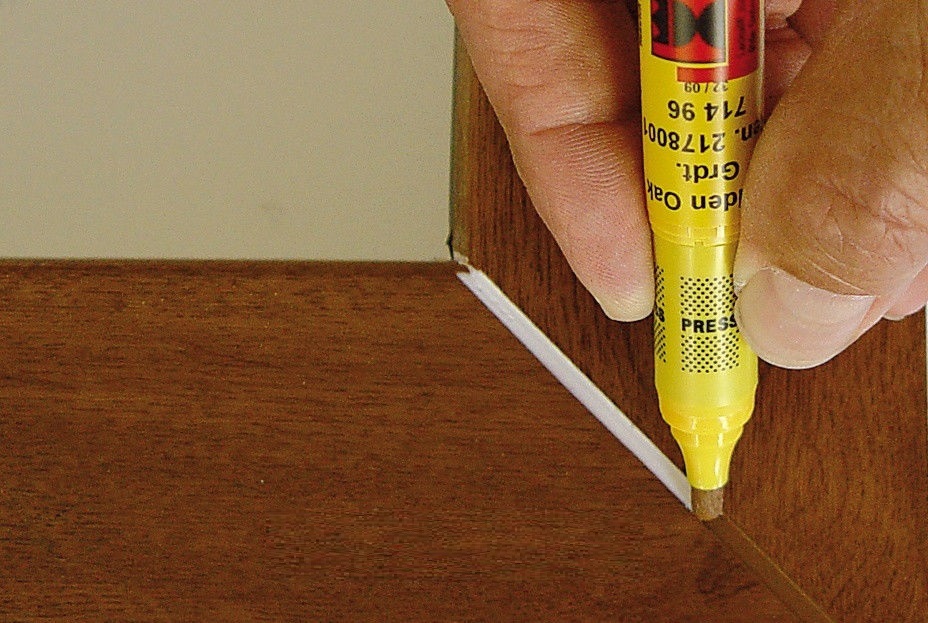
Retouching pencil for repairing furniture made of laminated chipboard
- chips;
- cracks;
- wiped surfaces.
To eliminate chips of various depths and scales, you should perform a number of actions:
- It is necessary to prepare the existing defect for repair work. The chip is processed with a chisel so that all edges become straight. The prepared defect is covered with hard wax of the appropriate tone. The melted wax is applied with a small amount of wax in a not very thin layer. It is necessary to wait until the applied material dries and remove its excess, forming a clear angle. After this, sand the restored area using a felt cloth.
- You can restore the required surface texture with a retouching felt-tip pen. It is necessary to select a coloring agent according to color scheme repaired furniture.
- At the final stage, the chipped area is treated with a special spray varnish to restore the shine and gloss of the product.
Elimination of scratches of various depths occurs as follows:
- Soft wax is applied to the defective area using a spatula. If necessary, you can further compact and level it if the scratch is deep enough.
- The color texture at the scratch site can be completed with a felt-tip pen. To create a slight blurry effect, grout with a napkin.
- The result is fixed with spray varnish.
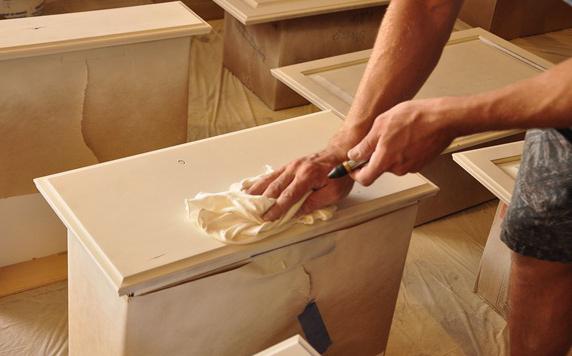
The worn surface of chipboard furniture can be renewed using a microfiber cloth.
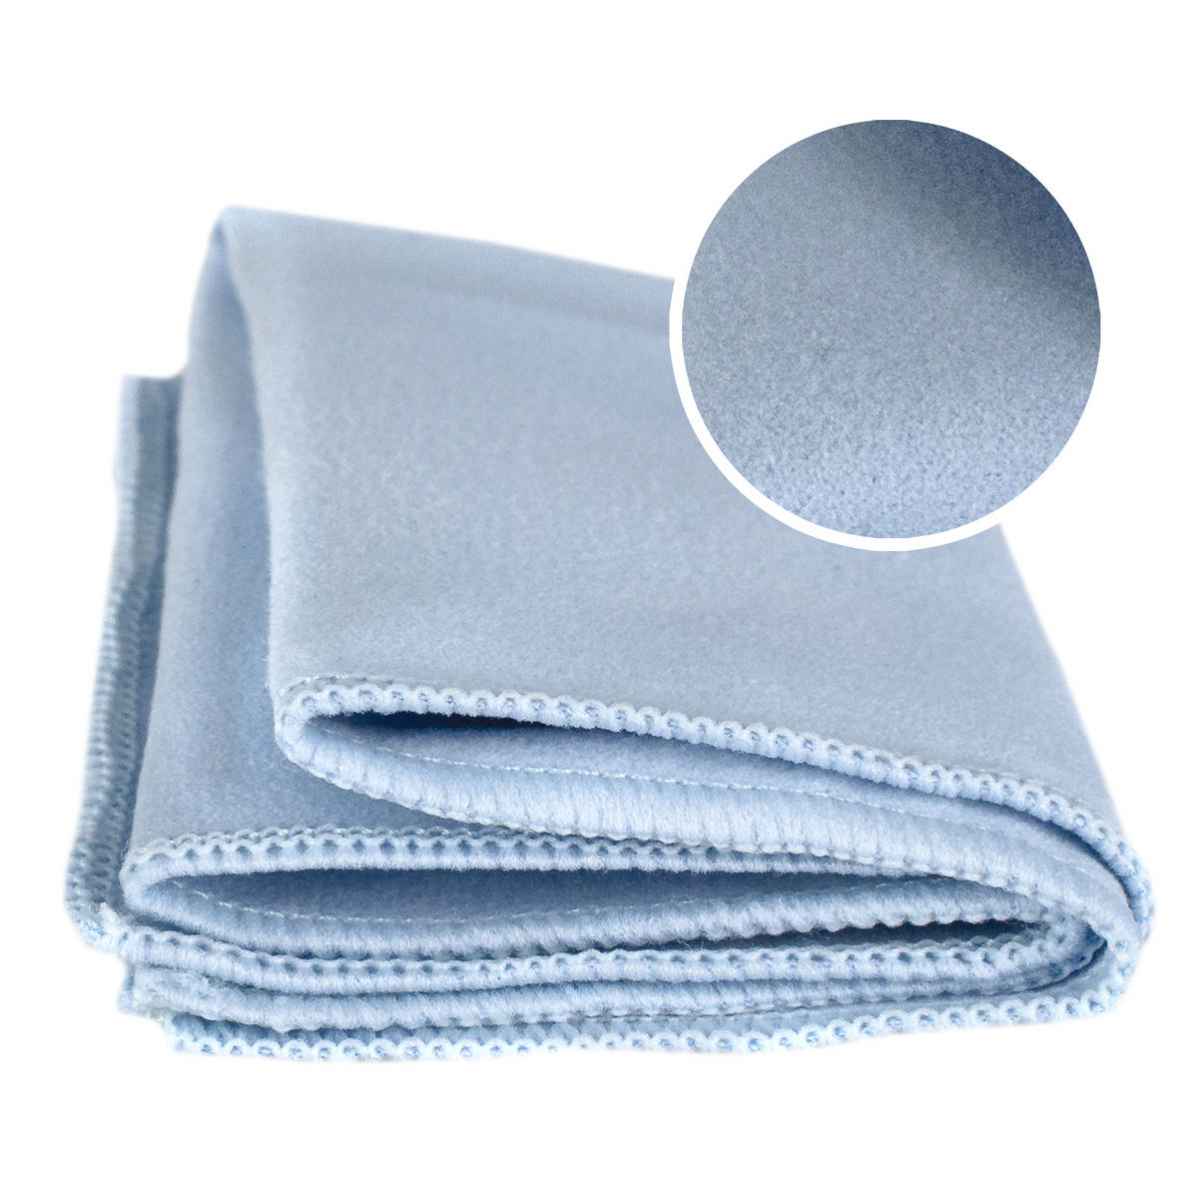
The worn surface of chipboard furniture can be renewed using a microfiber cloth
It must be moistened with a felt-tip pen, matched to the color of the furniture, and rubbed with light vertical movements at the place of wear. Once the desired coloring effect is achieved, varnish is applied to fix the result.
What materials are needed for the work?
In order to make or repair chipboard furniture with your own hands, you will need minimum set tools and materials. Everything you need will be found in the house, and what you need to purchase will not be expensive.
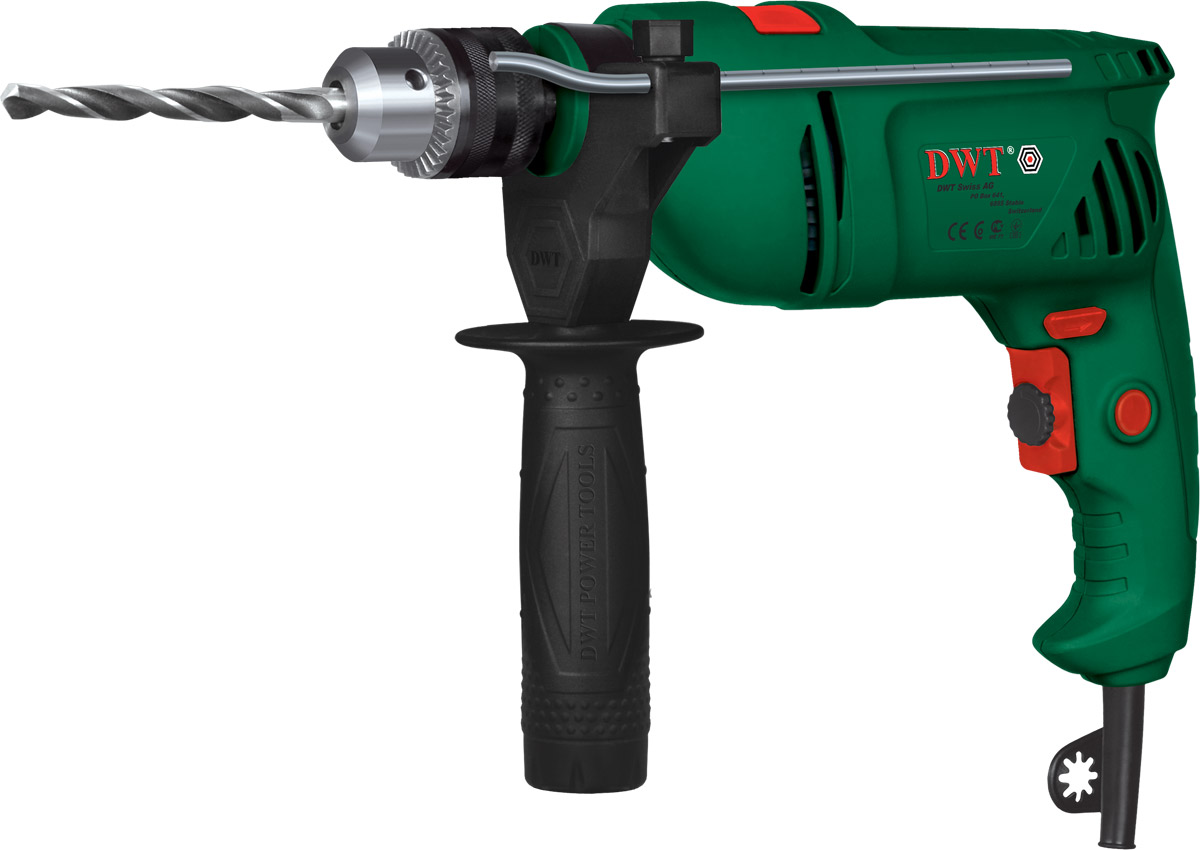
Drill for repair work
To carry out the work you will need the following tools:
- Drill or screwdriver. I would like to point out that a drill is better suited for assembling furniture. The tool should not be too heavy.
- Other power tools – jigsaw, router, circular saw. In the absence of such, all instruments can be rented.
- Measuring tape, metal ruler, square and building level.
- Small tools for assembling the product - drills, countersinks, hex wrench.
- The template for drilling holes is a jig.
To update old furniture from chipboard you may need the following list of tools and materials:
- soft and hard wax of the required shade;
- felt-tip pen for retouching the corresponding color;
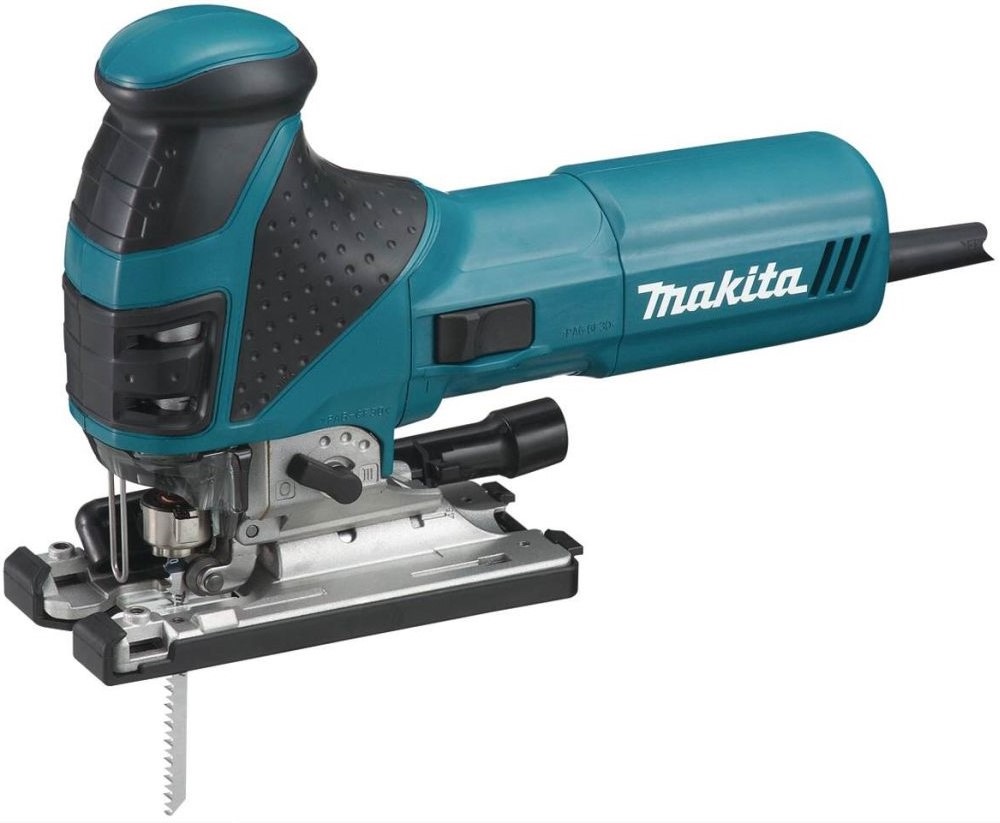
Jigsaw for repair work
- wax melter;
- staple;
- special varnish for fixation;
- felt fabric;

PVA for repairing chipboard furniture
- PVA glue;
- syringe with needle;

Tape measure
- adjustable lock.
Having this set of materials and tools, you can put furniture made of chipboard in order, eliminating all flaws in the form of scratches, cracks and chips.
Old interior items made from chipboard can be repainted, giving them a completely new look and fitting them into the overall interior of the room. In addition, repainted furniture will look completely different from the standard assemblies that are offered in the furniture market.
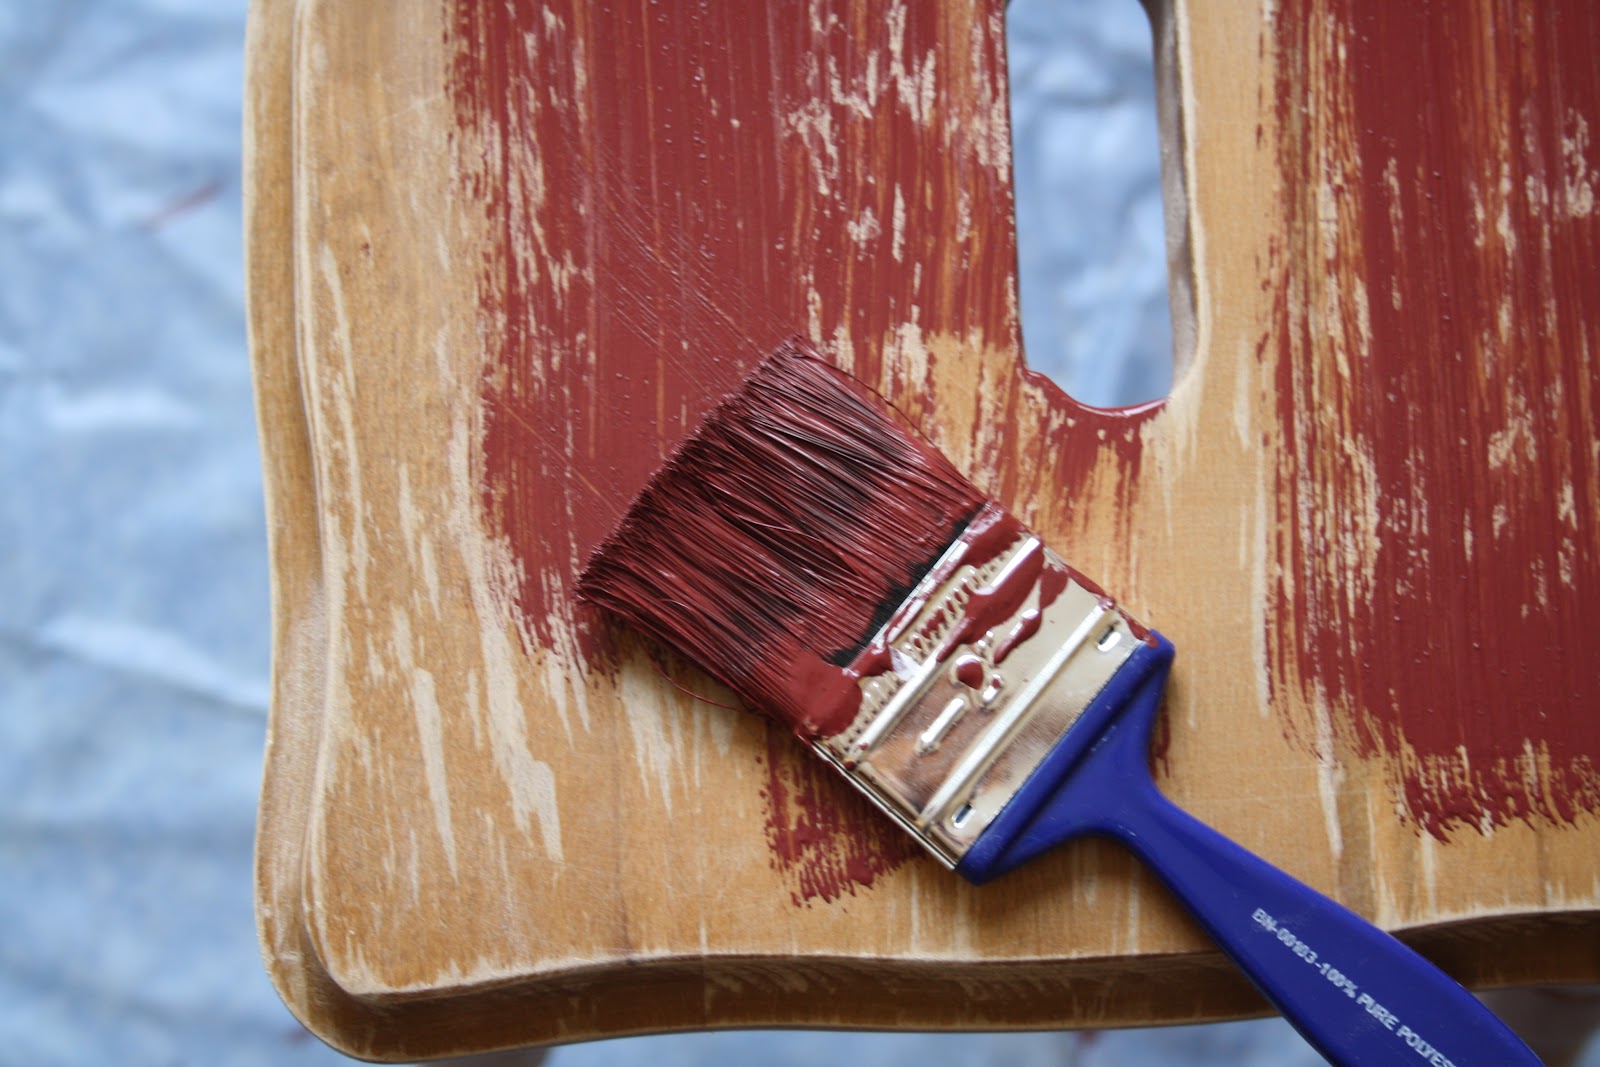
Old interior items made from chipboard can be repainted, giving them a completely new look and fitting them into the overall interior of the room
How to properly repaint chipboard furniture with your own hands to maintain a beautiful aesthetic appearance? First of all, you should carefully carry out all the necessary preparatory work for painting:
- Remove all external decorative elements and pens.
- Rub out small scratches on the surface of the chipboard using regular sandpaper. This creates a slight roughness effect.
- The prepared elements are coated with a specialized primer solution for wood materials. It should be noted that the color tone of the primer must match the future color of the furniture.
- If the surface of the product is damaged (there are large scratches, chips or other flaws), it must be additionally leveled with a spatula and re-primed.
- The last stage preparatory work is to degrease the surface using regular alcohol.
Do-it-yourself painting of chipboard furniture is done with a roller or paint brush. The advantage of using a roller is that it coats furniture with paint more evenly and economically, but is only suitable for flat surfaces. If there are various decorative reliefs, you should use a regular brush.