Don’t know how to make slopes for plastic windows with your own hands? I will tell you about sandwich panels that can easily solve this problem. And as a bonus you will receive step by step guide for installation of slopes.
What are sandwich panels
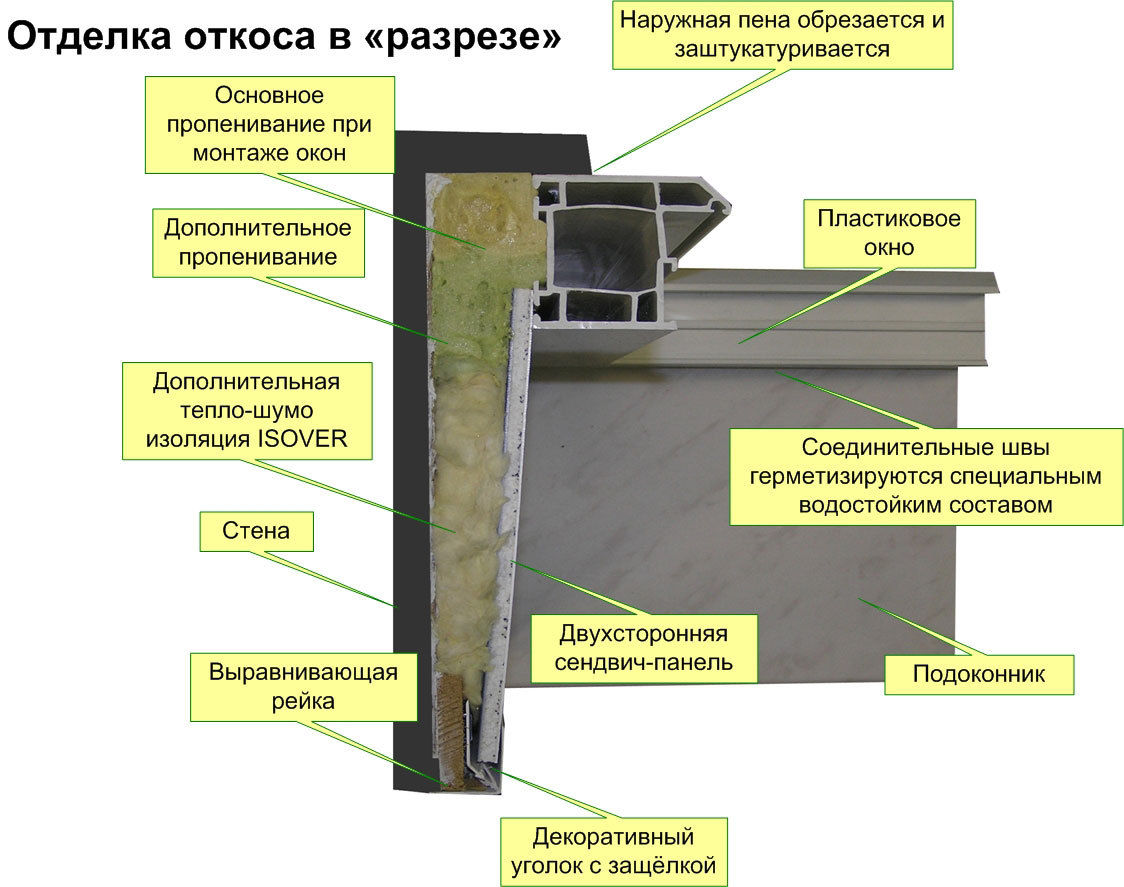
From the name of the material it is easy to guess that it is multilayer. The outer layers are PVC (polyvinyl chloride) sheets. The inner layer is made of polyurethane foam insulation, which is well known for its excellent thermal insulation properties.
Sometimes extruded polystyrene foam is used as a thermal insulation material, which also has similar characteristics.
As a result, sandwich panels for window slopes They do not differ in appearance or performance from ordinary PVC panels (plastic lining).
Advantages:
- Low thermal conductivity;
- Good sound insulation qualities.
The only drawback of this material, when compared with plastic panels, is the higher price - 350-400 rubles for a panel measuring 300x3000x10 mm. A regular plastic panel can be purchased at half the price.
Installation technology
Installation of slopes made of sandwich panels is no different from finishing with conventional plastic. Therefore, the work can be divided into two stages:
Preparatory work
Before finishing the window opening, you must:
| Illustrations | Description of work |
 | Prepare materials. At this stage, you only need an antifungal composition. |
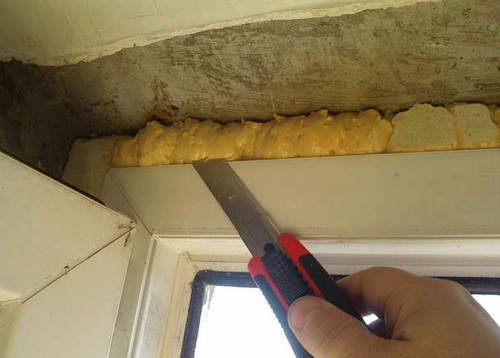 | Trim the foam. Cut off any protruding mounting foam around the perimeter of the frame. |
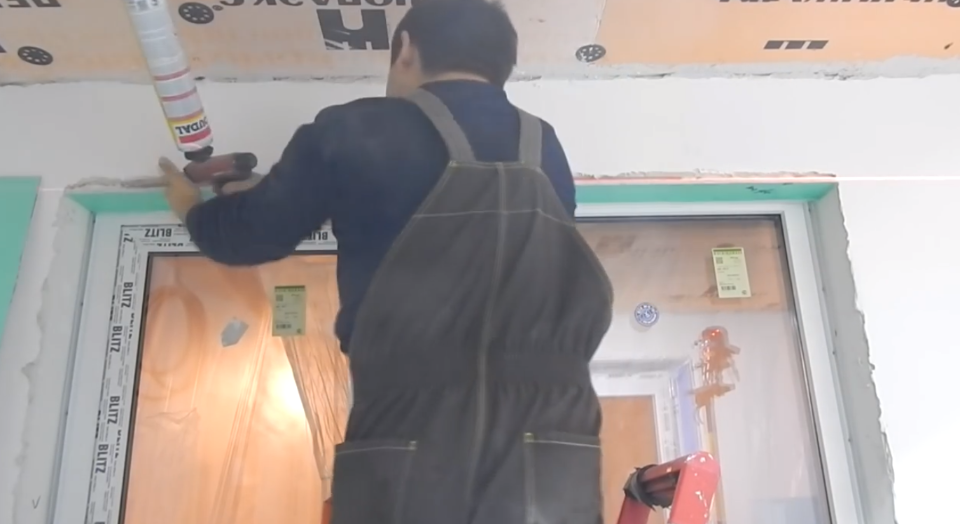
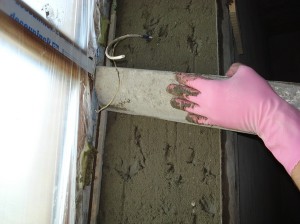
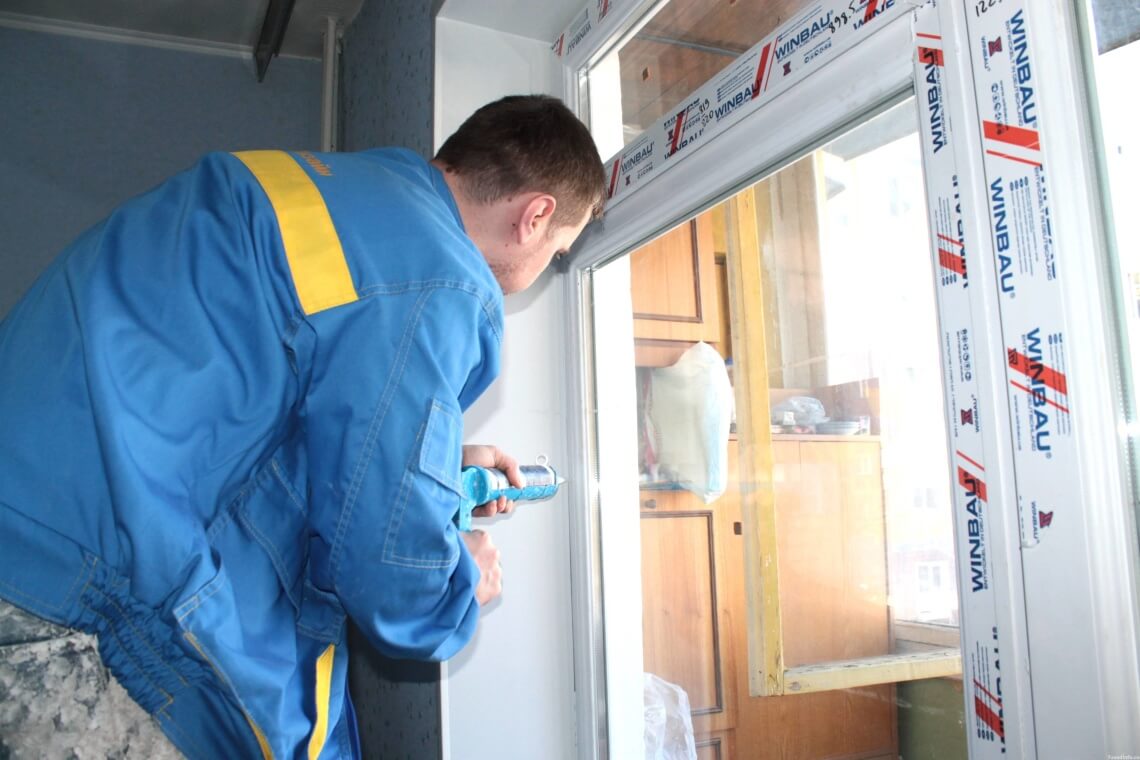
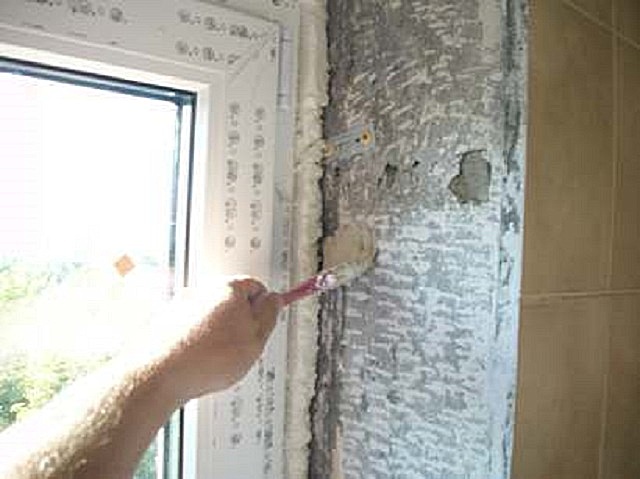 | Treat the opening with an antifungal compound. Cover the surfaces of the window openings that you plan to finish with an antiseptic liquid using a brush or paint roller.
|
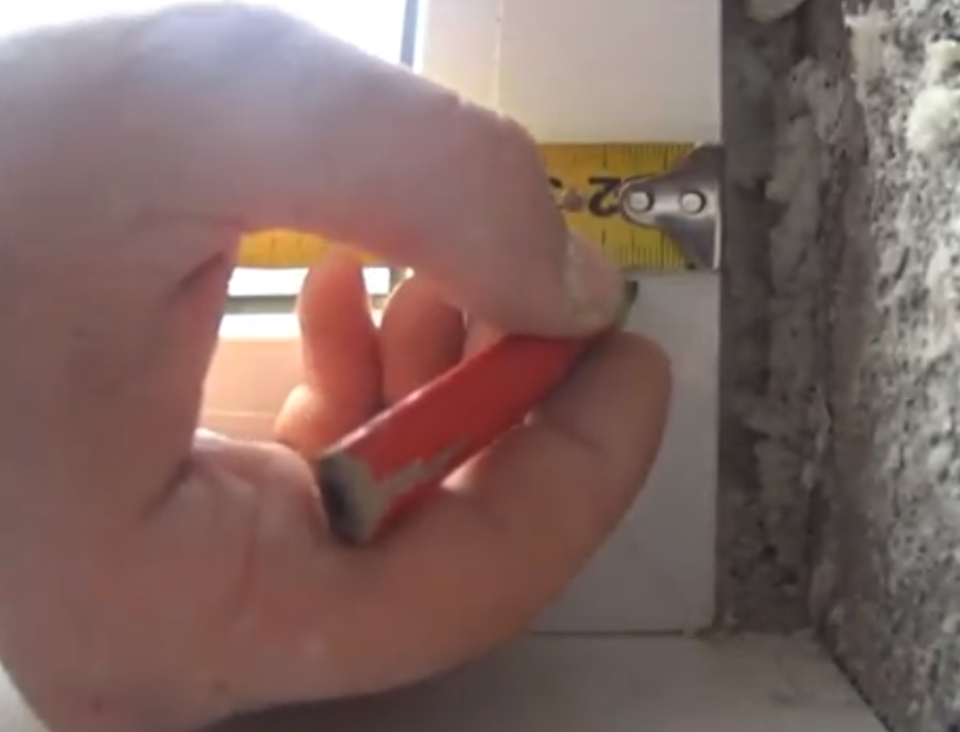 | Mark the frame:
|
 | Mark the layout:
|
This completes the preparation.
Installation
Do-it-yourself finishing of slopes with sandwich panels is done as follows:
| Illustrations | Description of work |
 | Preparation of materials. In addition to the sandwich panels themselves, you will need:
|
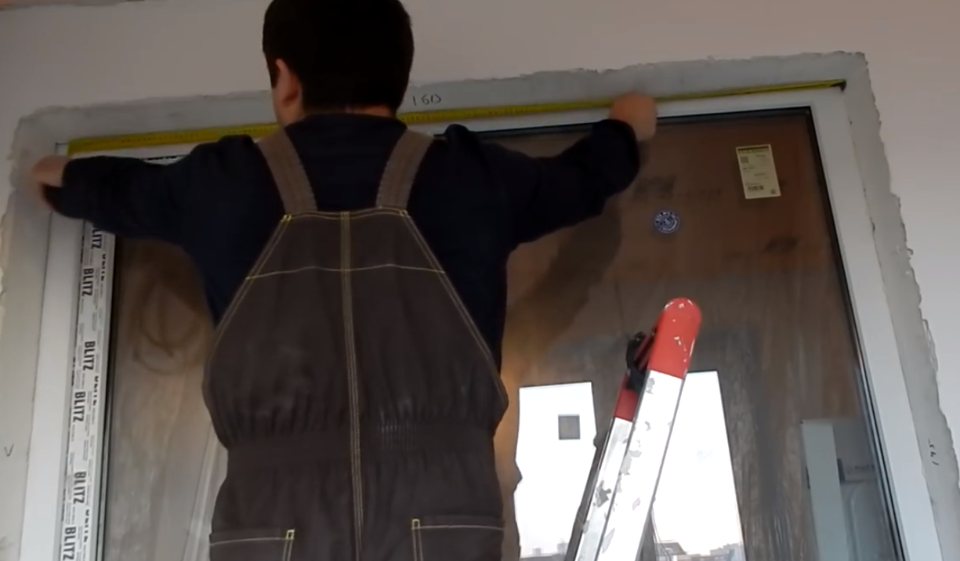 | Frame measurement. Measure the frame around the perimeter and write down the data obtained. |
 | Profile marking. Mark the profile according to the window measurements. You will need two planks equal to the frame, and one plank equal to the width. |
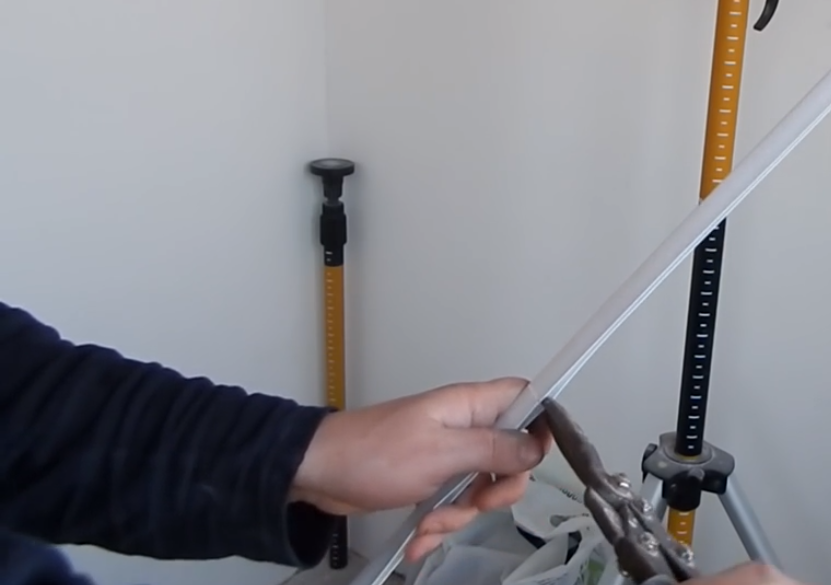 | Profile cutting. For these purposes, use metal scissors or a sharp mounting knife. |
| Installation of profiles. Secure the profiles around the perimeter of the frame with self-tapping screws, placing them in increments of 15-20 cm. | |
 | Measuring the opening. Measure the depth of the opening, taking into account the layout, as well as the external height and width. |
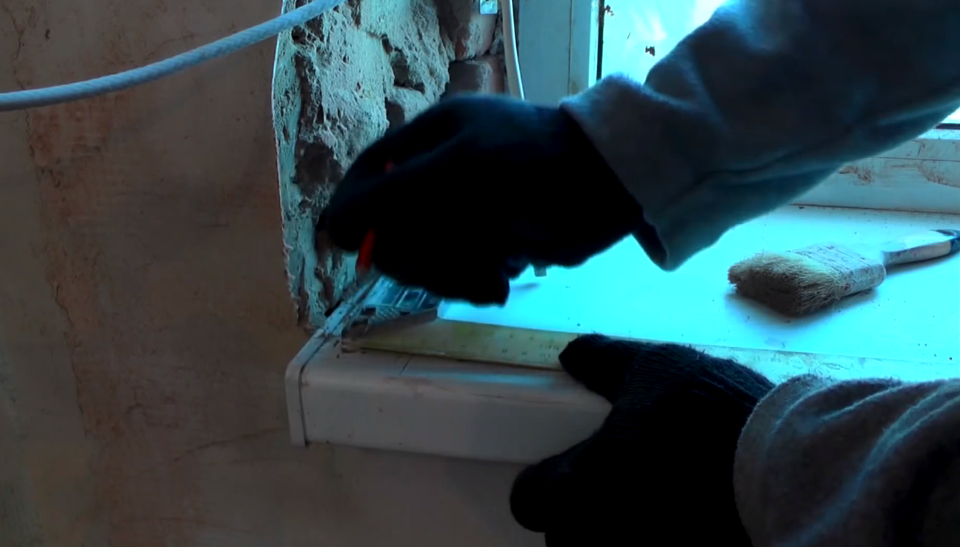
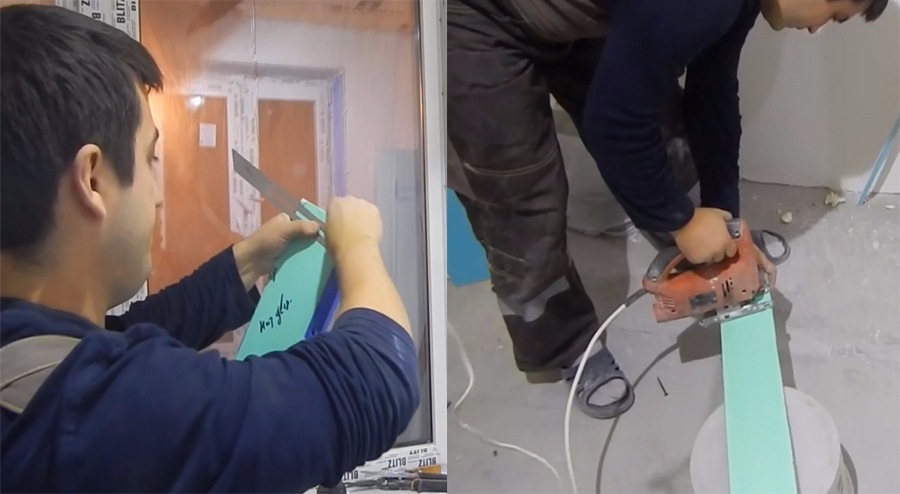 | Preparation of panels:
|
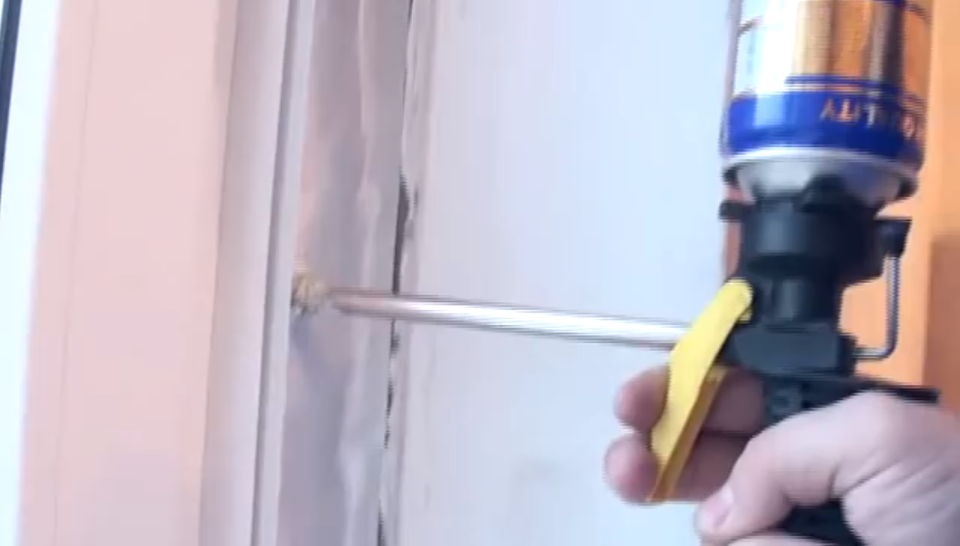 | Sealing cracks. The space between the starting profile and the opening must be filled with polyurethane foam. |
 | Installation of panels. Now you can begin installing the slopes:
Install the vertical panels in the same way.
|
 | Installation of vertical platbands:
|
Installation of the top trim:
|
|
 Bend the edges of the platbands and glue them with mounting glue. Bend the edges of the platbands and glue them with mounting glue. |
Here, in fact, is all the information about how to install slopes from sandwich panels.
Conclusion
As you can see, the process of installing slopes from sandwich panels is simple and quick, and most importantly, it does not involve wet work. Before you start editing, watch another video in this article. If you have any questions, write comments and I will be happy to answer you.
Replacing windows and everything connected with it is one of the important stages of any repair, so let’s look at how window slopes are made from sandwich panels, and discuss the material itself and its properties.
1 Basic functions of window slopes
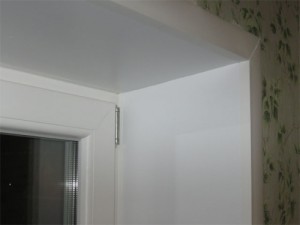
The role of slopes in creating the interior and comfort in the house is almost the same as the windows themselves, so you cannot replace some and leave the others completely unattended. In addition, if integrity is compromised, it will not only negatively impact appearance the entire room, but will also lead to drafts - and to feel truly comfortable, you will have to increase heating costs.
But creating an interior and protecting from cold street air are far from the only functions assigned to window slopes. They also contribute to more long term operation of the windows themselves, protect the installation seam and improve sound insulation. Plus, sometimes the sizes of old and new windows do not correspond slightly, and then gaps of up to 10 cm can appear between the frame and the walls of the window opening. They are very easy to hide by making a competent installation or other material. Below will be discussed different types finishes, their advantages and disadvantages.
2 How to choose finishing material for slopes?
So, one of the very first ways to finish slopes is to plaster them. Its advantages include relative savings and the ability to make a fairly thin layer, but keep in mind that you will have to work hard. To get a perfectly smooth surface, you need to have some skills. Yes, and you need to work with a solution, so you can’t avoid dirt.
Another option is drywall. It also has a number of advantages, such as speed of installation, low cost and versatility. Disadvantages include fear of moisture and relatively low strength. Difficulties may arise during installation, especially if you are doing it for the first time, and over time such slopes should be repainted.
There is another new and increasingly popular material that can also be used for covering window spaces - sandwich panels. They are practically no different from the well-known plastic. They are also easy to attach, and there are no problems in operation; you just need to wipe them with a damp cloth. But these are far from the only advantages; below all their pros and cons will be discussed in more detail.
3 Why is it worth making slopes from sandwich panels?
Before discussing their benefits, a few words should be said about what they are. So, This material consists of three layers, the outer ones are PVC panels, and the middle one is foamed polystyrene, it is thanks to its multi-layered nature that the product got its name. Because of this successful combination, they have excellent noise and heat insulation characteristics and are completely unpretentious in maintenance. It is also worth noting their excellent strength, and they are absolutely not afraid of excess moisture compared to the same drywall. And due to the light weight, installing slopes from sandwich panels is not too difficult - if you had the desire, then doing it yourself is quite possible.
In addition, this material is not expensive or scarce, so almost everyone can afford it. Plus, it will harmoniously fit into any design; this, by the way, will be facilitated by an incredibly wide color palette. And even the brightest and boldest colors will remain so after several years, since these panels are absolutely not afraid of exposure to various cleaning agents or ultraviolet radiation. As manufacturers promise, the shelf life is measured in decades.
The disadvantage of such panels is their instability to mechanical loads, so after installation, try not to hit the slopes with anything or lean heavy objects on them.
4 Installation of slopes from sandwich panels - step-by-step instructions
Having understood all the characteristics of this material, you need to pay attention to the installation features. Let's try to master the construction of slopes from sandwich panels without professional skills?
How to install slopes from sandwich panels - step-by-step diagram
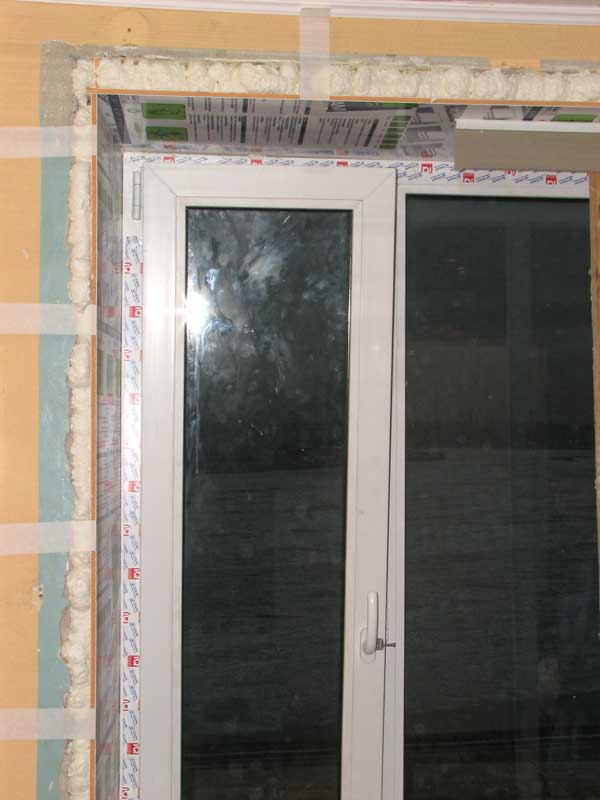
Step 1: Preparatory work
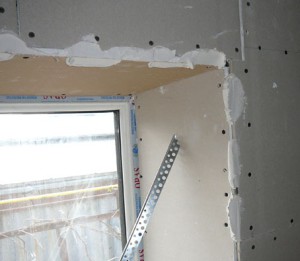
At least a day after installing the new windows, you can begin directly finishing the slopes, and it all begins, of course, with preparation. At this stage, in general, there is nothing new. We cut off the protruding foam and remove all debris, dust and dirt from the surface; the use of a vacuum cleaner is welcome, although you can also use a simple sweep. The brick surface can be treated with a primer. Next, to find out what sizes of sandwich panels for slopes are needed in a particular case, you should take measurements. So, we take a tape measure in our hands and measure all the necessary geometric parameters.
Step 2: Selecting a tool
As mentioned above, you can’t do without a tape measure, but in addition to it you will also need the following accessories, which every man probably has. So we prepare: a level, a pencil, a ruler, a construction knife, a screwdriver with self-tapping screws, a grinder or a metal saw. The latter are necessary to cut the plate to the required size.

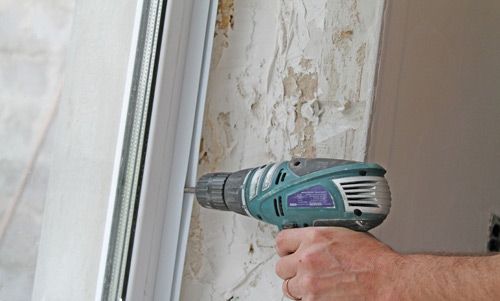
Step 3: Installation of the starting profile
Cladding slopes with sandwich panels begins with fixing the “P” profile. Using the measurements taken earlier, we cut the pieces of the required length. Next, we attach them to the window profiles using self-tapping screws, while maintaining a distance of at least fifteen centimeters. Moreover, the top element is fixed first, and the sides are already adjusted to it so that there are no gaps. In principle, using a starting profile is not always necessary, and how to install the panel without it will be discussed in the next step.
Step 4: Installation of panels
Let's start with the option that involves P-profiles. In addition to the main frame from these plates, you should also cut off four parts from the main profile (two on each side), which will correspond to the width of the slopes. Then they need to be inserted from below and above into the already fixed U-profiles located on the side walls of the slope, and secured in this position with self-tapping screws. And a strip of sandwich panel of the required size is inserted directly into the finished frame.
Sometimes some craftsmen ignore the installation of the main profile and simply attach the panels close to the window sill, and the resulting gap. But this is not entirely correct, since in this case the seam will get dirty very quickly, and it is quite difficult to clean it, so the aesthetic side will suffer. If you don’t want to tinker with profiles, then you can simply place the panels on mounting foam, recessing it behind the window profile by at least 10 millimeters. But this option is more labor-intensive, as it is more difficult to maintain vertical and horizontal lines.
Nowadays technology does not stand still and is constantly improving. One of these innovations is the installation of slopes with sandwich panels. Having a sufficient number of advantages, the panels are becoming more and more popular every day, and even an inexperienced beginner can install them.
Material properties
The structure of standard panels looks like a sheet, the outer side of which is solid-sheet PVC, the inner side is sheet polystyrene, and there is insulation in the middle. That is why this finishing option was called the American word - sandwich panel. They differ only in the material of the facing side, and the installation remains the same for any type.
Important! People call sandwich slopes – warm slopes. This is due to the insulation that is present in the panel.
Once you have already imagined what they are, I will tell you about their advantages:
- Despite their popularity, they remain accessible to everyone due to their reasonable price.
- This is not just a building element, it is also independent device, which has its own set.
- The internal space is filling mineral wool or foamed polystyrene - this indicates the non-flammability of the structure.
- Excellent thermal insulation performance, as well as additional sound insulation, is achieved with their help.
- This finishing method is durable and strong.
- If you do the installation yourself, you must strictly follow the installation technology. In this case, resistance to moisture and mold will be at a high level.
For those who have decided to change the windows in their house or apartment and install the slopes with their own hands, I will give you advice: you need to wait at least 24 hours after installing the windows and only then finish the slopes with sandwich panels. The advantage of installing a sandwich over plastering is that installation by hand does not require painting skills and is a clean method.
It is important not only to correctly install the slopes, but also how to cut the panels. It is better to cut plastic elements with a disk circular saw on plastic or aluminum. At the same time, a fine tooth pitch can cope with the task perfectly. In addition, the material must be cut at a temperature of +5 degrees Celsius - if the temperature regime is not observed, then due to a decrease in impact strength, chips may appear on the cut line. If the slopes are finished with PVC sandwich panels, then you can cut them with many tools. But the most optimal one is a hacksaw for metal; it can also be used for wood. You need to cut face up and with a slight angular inclination. At your own peril and risk, you can cut with a grinder, but if you apply a little too much pressure, the panel may break.
Let's start installation

It will be quite easy to make slopes with sandwich panels if you follow the rules and sequence of actions. Even if you don’t have experience finishing slopes with your own hands, you don’t need to be afraid of this work. Before starting installation, you need to prepare tools and materials, you will need:
- Sandwich panel – you choose what material to buy from yourself
- Start profile
- F profile
- Liquid plastic – used as desired
- Tape measure and knife
- A screwdriver with self-tapping screws, a screwdriver and a drill - probably every home has the latter.
I have already said that installation should be done at least 24 hours after installing new windows. Using a tape measure, you need to take measurements and cut out panels for the side and top slopes. Use a knife to remove unnecessary pieces polyurethane foam and the installation of the starting P profile begins using self-tapping screws for fastening. They need to be screwed in with a gap of 10-15 cm. Do not forget that the top profile is attached first, and only then the side ones should fit tightly with the top one. Next, we proceed to install the slopes using a sandwich panel; it is inserted into the grooves of the profile. Using the same scheme, we start from the upper slope.
- The first is to insert pieces of the starting profile into the vertical bar from above and below, and then the side panels go into these grooves.
- The second is to simply attach the panel end-to-end with the window sill and upper slope, after which the gaps are closed using liquid plastic.
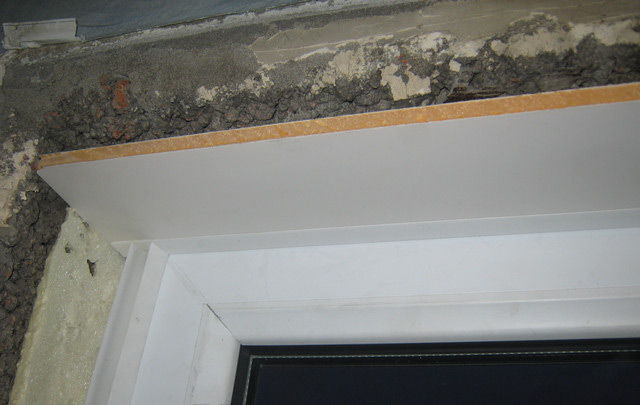
When this stage is completed, all that remains is to give the slopes a finished look. To do this, use the f profile; it needs to be secured to the edges of the sandwich fabric. For additional thermal insulation, the voids between the sandwich sheet and the wall are filled with polyurethane foam - this process does not bring any inconvenience, since it is very easy to dismantle the profile. After filling the voids, the bar is returned to its place.
Replacing windows in your home is always a big event in your home. Especially in cases where old non-functional structures are replaced with modern ones that meet the latest technology. But at the same time, the inside of the opening in which the window system is located is also damaged. It must not only be decorated, but also insulated. Warm sandwich panels will help with this. Let's look at how to install them with our own hands, and what we need for this.
How it was before
In the old days, slopes were simply plastered cement mortar, which was then puttied and painted. The distance between the window frame and the wall was filled with tow, which served as insulation. At a later time, glass wool could be used instead of this material, but this was in very rare cases.
The finishing of slopes became much more diverse at the end of the last century, when various plastic materials. Many people tried to transform the interior of their own apartment with their own hands, and at the same time get more durable and attractive openings.
At first, sheet plastic was used, which had to be secured only by creating an impressive wooden frame. But this design did not require any more maintenance, unlike the slopes, which had to be sealed with cement mortar. And this was just the beginning of the offensive of completely new materials on window openings.
A fresh look at the opening
Window openings began to look completely different when they began to be installed plastic windows. These technologically advanced designs have made it possible to obtain comfort and coziness for every room, wherever they appear. But the old materials for finishing were no longer suitable, since the interior and design solutions demanded the same new approach.

Home craftsmen, constantly experimenting in their work, began to use first plastic lining, and then panels, which quickly “took root” on the slopes. The enormous convenience of this material was ensured by PVC profiles, which were used as guides. They were easily attached to the windows and all that remained was to fill the opening with panels.
An additional advantage was that the work required minimum set tool. It was necessary to prepare:
- perforator;
- building level;
- screwdriver;
- tape measure and pencil;
- hacksaw

With him, the work went quickly and the craftsmen received high-quality finishing of the slopes when using panels. It is worth noting that almost anyone could now decorate window openings with their own hands.
It became even easier to seal slopes with the advent of insulated panels. These stiffer materials offered a huge advantage over other finishes. A frame was no longer required for installation. It was completely replaced by just one wooden slat, thanks to which it was possible to level the crooked wall. Otherwise, sandwiches, as the insulated plastic was called, came off the windows.

Independent work
Finishing slopes with your own hands is now simple and not difficult. The main thing is to follow certain rules that are not difficult to remember. The work begins when the windows are already in place, and the space between them and the wall is completely filled with polyurethane foam.
When the foam has completely dried, which will take no more than three hours, it must be cut around the entire perimeter of the window so that nothing interferes installation work. This is easy to do with a simple knife. Next, it is necessary to align the edges of the opening, especially in cases where they do not have a visually even appearance. A wooden strip will help to do this, on which it will be convenient to attach PVC panels later.
To install the leveling parts, you should drill holes in the edge of the opening and insert nylon dowels into them. Next, the slats are attached with self-tapping screws, which must be checked with a building level. These operations are easy to do yourself. When this stage is completed, you can move on to windows.
PVC profiles must be attached to them. This must be done around the perimeter of the windows so that there are no gaps. PVC strips are secured with small self-tapping screws, which will later be hidden due to plastic panels.
It is worth remembering that you should twist the profiles quite carefully, since any awkward movement can damage the thin plastic.
To make it easier to install PVC starting strips on windows, you can draw a straight line in advance using a building level. Then do-it-yourself work will come down to leveling the material along the existing line.
Mounting part
When the preparation is completed, all that remains is to make the slopes themselves. This is quite easy to do with your own hands, since all the work comes down to installing plastic panels with insulation. For convenience, you should use a thin knife to guide the material exactly into the groove without crushing the edges.
But first you should cut the PVC panels to the length and width of each slope. This will only allow you to later secure the material to the frame, since the sandwiches at the windows will be held in place by the profiles. Self-tapping screws that screw into the end of the plastic panels will also help to do this.
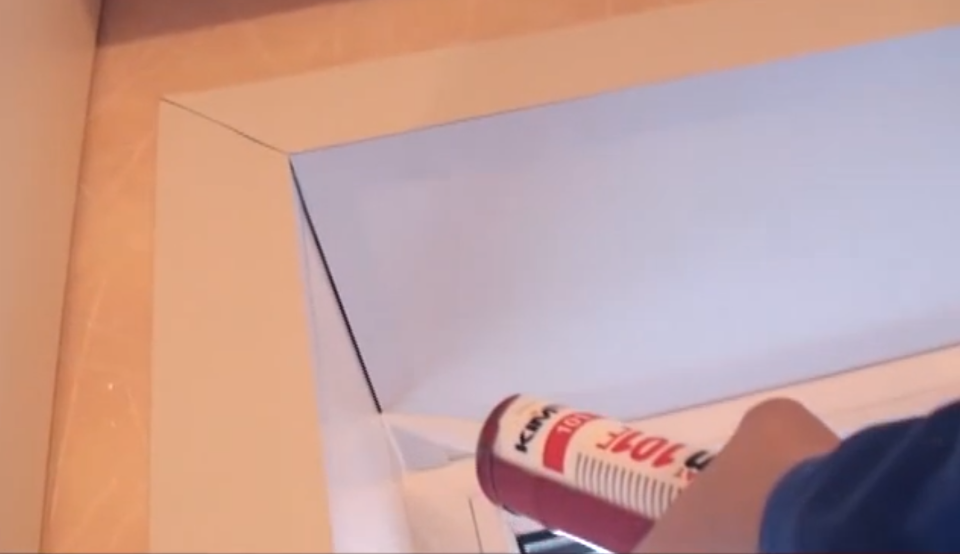
To top it all off, you need to install PVC corners on the window slopes. They will play the role of cashing out. A plastic F-shaped profile is also used, which is inserted into the sandwich. This element is attached with glue. But the edging of the window opening can be done differently. To do this, you will need a plastic corner with a width of at least 30 mm. It is cut to length and joined at the places where it intersects with each other “at the mouth”. That is, they cut at 45 degrees.
This work can be easily done with your own hands using ordinary scissors. But these actions must be performed very carefully, since the plastic is quite fragile and can chip or crack if not handled carefully. If this happens, the part will need to be replaced, although some craftsmen try to repair the damaged area using a special sealant that completely replicates the material of the element.
First of all, let's figure out what slopes are and what they are needed for. Slopes are the internal walls of a niche located in a window frame. Installing a window in itself is not a complete process unless additional manipulations are carried out, which in most cases include plastering, puttying and, if necessary, painting the structure.
Popular in modern times PVC products also require, which is represented by slopes and insulation material placed inside.
Is it possible to avoid purchasing thermal insulation materials? You can, to do this, just consider the slopes made of sandwich panels, which will not only provide the room with a warm temperature regime, but also give the window a finished appearance. The last parameter is also important, because the neat appearance of the window frame directly affects the design of the room and creates a certain opinion about the owner of the apartment or private house.
Pros and cons of slopes made of sandwich panels
Main advantages and disadvantages
This type of slope is made using polyurethane foam - a high-quality polyurethane-based sealant. The material is distributed centrally between two small sheets of PVC construction.
Among its main advantages are the following:
It's time to discuss the disadvantages of sandwich panels. Rather, they are associated with the low quality of the material offered, so when purchasing, pay attention to the manufacturer, do not be afraid to ask the sales consultant uncomfortable questions and demand to see certification.
 Pay attention to the quality of the panel material
 This is in your interests, because low-quality panels, under the influence of hot weather and high temperatures, acquire a yellow tint that cannot be eliminated, and become deformed, therefore they are considered extremely unreliable and brittle.
Much depends on the diligence and responsibility of the one who began installing slopes from sandwich panels. Negligent attitude, haste and inappropriate installation technology can subsequently lead to the formation of voids between the panels and the window sill.
Installation of slopes from sandwich panels
Studying the internal structure allows us to conclude that slopes made of sandwich panels are very similar to the usual plastic ones. If you pay attention to the functional component of these two copies, you will understand that they are technical specifications are also identical.
To make slopes from sandwich panels with your own hands, you will have to assemble several components of the product into one whole, namely:
- A profile made of plastic, presented in a U-shape. Its other name is the starting profile, because it is from its installation that the installation of the device begins. Fixation occurs directly along the perimeter of the window frame, creating the desired connection of the slopes with each other and with other important parts of the window.
- A sandwich panel is a composite where polyurethane or polystyrene is located in the center between the plates. The thickness of the panel can be very varied - from 10 to 32 mm inclusive. Which model is suitable in this particular case depends on the free area running from the edge of the window frame to its end. Experts recommend using a universal device, the thickness of which is 24 mm.
- The casing is a plastic profile that takes on an F-shape. The difference from the starting profile is that the platband additionally has a protruding wide part that covers the joint formed by the structure between the sheet and the corner of the window, which is located on the outside.
Craftsmen also use other methods of arranging sandwich panels. In most cases, brackets are used that fix the front part of the panel by attaching plastic platbands like a rail. This type of slopes is called European, and the assembly process is more reminiscent of a construction kit, allowing you to turn the installation of slopes from sandwich panels into an easy and quick procedure.
Step-by-step installation guide
Preparatory work
To install slopes from sandwich panels, you need to arm yourself with the necessary set of tools and materials. The following will be useful for work:
- Sandwich panel.
- P-profile, which is the starting profile.
- F-profile - the so-called device cover.
- Plastic in liquid form (preferably).
- Construction tape.
- A sharpened knife.
- Self-tapping screws measuring 2.5 * 7 mm.
- Several screwdrivers with different tips; the drill can be replaced with a screwdriver.
Armed with a tape measure, take measurements of the length and width of the slopes; this is the main guideline that determines the final dimensions of the sandwich panels for the slopes. Taking these values into account, cut out several strips with a knife: one will be located at the top of the window, and the remaining two will be on the sides.
Now let's talk about how to correctly cut the elements of a sandwich device:
- The width of the elements is 10 mm larger than the initial dimensions of the window, this will ensure closer contact with the frame.
- A hole should be cut around the window frame directly in the hardened foam, the depth of which is 100 mm and the width is 1 mm.
- On the edge where the sandwich panel will be located, measure 10 mm and draw a line. Cut the material strictly along the line, but only cover the upper and insulating levels. How to cut a sandwich panel for slopes? You don't need a special tool for this; you can use an ordinary kitchen knife.
- Cut from the end, remove excess layers.
If you plan to finish slopes with sandwich panels in one place, you can try to save money and buy ready-made, cut strips without purchasing a whole panel.
Main part of the work
After preparing the necessary tools and materials, we move on to the main part of the slope installation process. First we install the frame:
- We carefully process the window frame - get rid of excess polyurethane foam, go over the structure with a cloth to clean it of dust and debris.
- We distribute vapor barrier material over the entire area of the slopes. If you want to further insulate the openings, use foam strips.
- Using a brush, aerosol or directly from the tube (depending on the packaging), apply an antiseptic agent to the coating, which in the future will protect the window from mold, fungal growth and other harmful substances.
- Focusing on the inside of the device, following the perimeter, install the sheathing made of wood. The dimensions of the slatted material are 20*40 mm. The lath is secured with dowel nails. Maintain a distance of 40 mm. In the areas of the seams where the side and top laths of the sheathing meet, leave a gap of 10 mm or more - this will be needed for installing PVC elements on the slopes at the top. If the frame cannot be fixed, the cladding with sandwich panels is fixed.
 The outer strips overlap
 Installation of panels is always done from the top of the window frame, moving to the bottom. Place the protruding element into the formed groove so that the part fits snugly against the window. Fill the free space with a material that will maintain temperature and insulate the window structure from drafts; for this it is better to use isover.
The outer side is secured using self-tapping screws; check the correct position of the top trim using a building level. The finishing of the side slopes is a special edge finishing.
Conclusion
When the installation of the slopes has come to an end, arrange an F-profile on top, covering the sloppy edges of the panels with it, forming a kind of overlap at each corner, trim off the excess again and enjoy the end result.