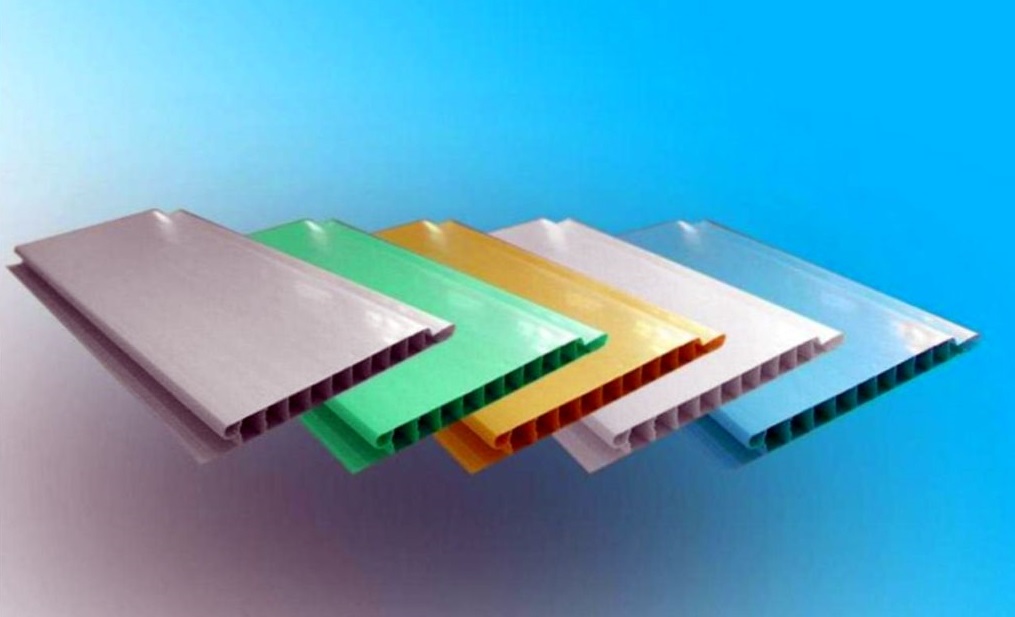
Wall and polyvinyl chloride are widely used due to their low cost and high performance characteristics. In order to properly attach the plastic panels to the lathing, you need to follow some rules and use only high-quality ceiling profiles and screws.
These ceilings don't go through. From home you can help calm the heat and create a more comfortable environment. Plastics are already used in the production of pipes and recent years has become more present in designs with slabs used in spacers. This material has high performance in environments. Its resistance ensures that it lasts up to forty years and is not deformed or affected by termites, seaweed or moisture. The reduced weight of the material eliminates the need for heavy-duty equipment to support it.
How to attach PVC panels to the ceiling
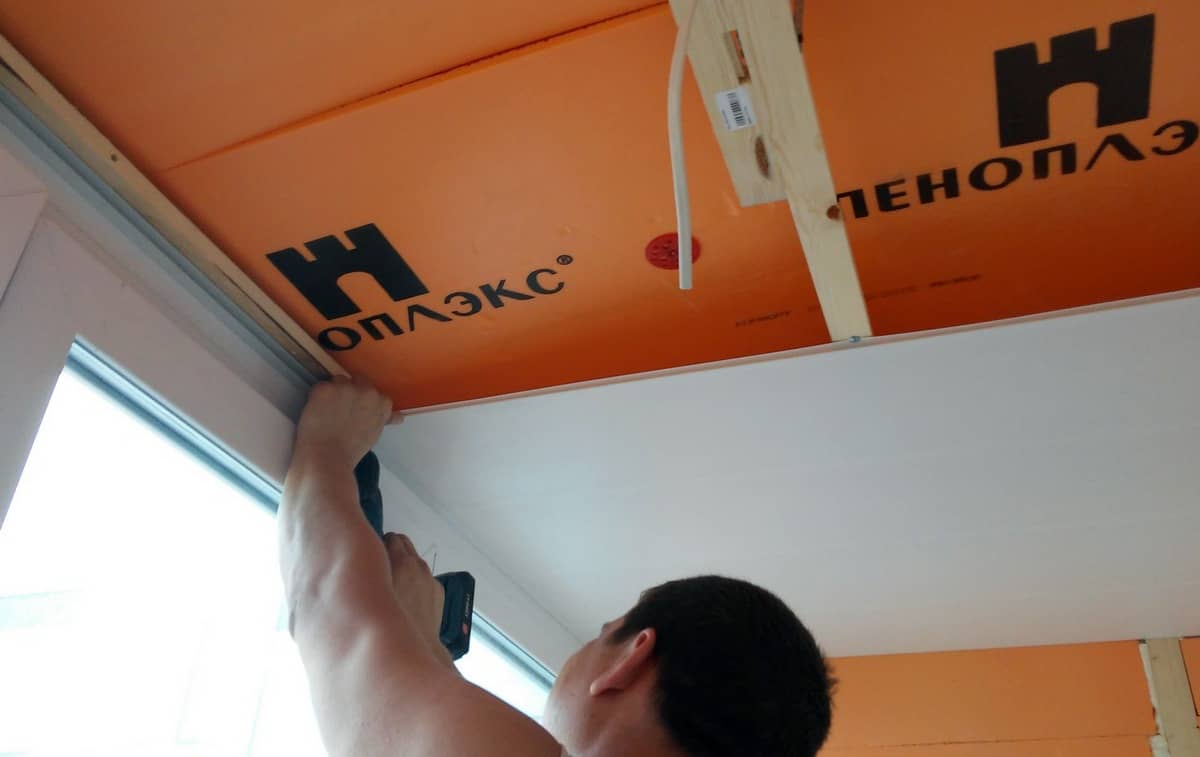
Before installing the plastic panel on the ceiling, you need to install the sheathing and the starting profile. It is made of wood or profiles made of aluminum. After you check the evenness of the sheathing, you can begin installing the PVC panels.
Remember that before starting installation, you should carefully check the flatness of the plastic panel and make sure that the stiffeners and grooves are not deformed. Otherwise, you risk installing a low-quality panel, which will lead to deformation of the entire structure.
The application process makes little noise and dirt. Simple overlays are indicated for indoor use. Beads are more often used for cladding in outdoor environments. Typically, square profiles are used in structures to provide greater plate support, but they can be found in a wide variety of formats. You will also need finishing rulers for installation.
During attachment, the first step is to install the metal structures. Ideally, your knees should be 1 meter from the highest point of the ceiling and at least 2.80 m from the ground. With this specific height, drill holes with all the walls that will support the structure. It is important that they are aligned with the holes in the opposite wall and should be 50cm apart. Attach metal rods to the holes in the walls. Each end should be installed into the opposite wall.
Sheathing is carried out in several stages:
- Cut the plastic panels using a hacksaw. Don't forget to cut holes for the lights.
- Attach the first panel to the starting profile. It needs to be fixed with self-tapping screws.
- Install the remaining panels in the same way.
- The last panel must be secured extremely carefully. Remember that the size of the last panel should be slightly smaller than necessary, since the material tends to expand under the influence of temperature. If this does not happen, then you can hide the gaps using putty or a special ceiling plinth. The last panel is fastened using self-tapping screws.
How to fix PVC panels to the ceiling without using a starting profile
If desired, you can fix the canvas on the ceiling without using a special starting profile. This installation method is believed to be much simpler. For installation you only need to secure wooden blocks or metal profiles on the ceiling.
For support, make sure the bars form a checkerboard pattern on the ceiling. With the rods installed, secure the wall bolts and bolts using the corners. The next blade must be inserted into the first blade. The connection is always made with the male side on the inside of the part. Follow the blade insertion sequence completely. For better attachment, use screws to attach the blades to the metal profiles. If necessary, make a split between one blade and the other.
Use a spatula to place the other end into the front blade. Remember that you will also need electrical installation for light bulbs. In addition, the plastic ceiling in the kitchen, in terms of caring for them, because the panel is easy to clean and can use almost all the cleaning products that you use in the apartment.
Technology for installing PVC panels on the ceiling:
- Cut the polyvinyl chloride panels and make holes in them for the lamps.
- Press the first panel as tightly as possible against the wall. Secure it using self-tapping screws.
- Set up subsequent segments in the same way.
- During installation, make sure that large gaps do not form between adjacent panels. If you notice that a groove or stiffener has become deformed, it is better to disassemble the entire structure and replace the faulty panel.
- Then insert the finishing profile and install the last panel. To make it easier to install the last segment, use a wide spatula.
If you decide not to use a starting profile, then it is best to use metal screws that have a wide head. Such products will provide the most reliable fastening. If you do not have such self-tapping screws on hand, you can attach plastic panels using press washers 10-15 millimeters long.
What do I need to install a plastic ceiling by hand?
The ease of installation of ceilings can also be associated with the advantages of plastic panels. The usual width is 250 mm, the usual length is 600 cm, the thickness of the panels can vary from 5 to 8 mm.
Before installing the ceiling in a plastic kitchen, it is necessary to prepare the floor for assembling the frame.
- It is also used as a support for wooden planks.
- Screws of different sizes and plastic boxes, clamps, metal staplers.
- Screwdriver or electric drill with a #2 blade for screws.
- Knife design with replaceable blades, design area, pencil or marker.
- The most important thing is the desire to do suspended ceiling in the kitchen with your hands.
How to properly fix the last panel on the ceiling
Attaching the last plastic panel to the sheathing is the most critical process, which requires almost jewelry precision from you. If you install the last segment incorrectly, you will have to disassemble the entire structure completely, so take this process very seriously.
In general, this is true for a main ceiling that will be attached to a wooden structure. The main ceiling must combat all putty and putty putty and remove stain moisture and mold, if any, and their sources. In some homes this may involve removing the bend to connect the ceiling to the wall.
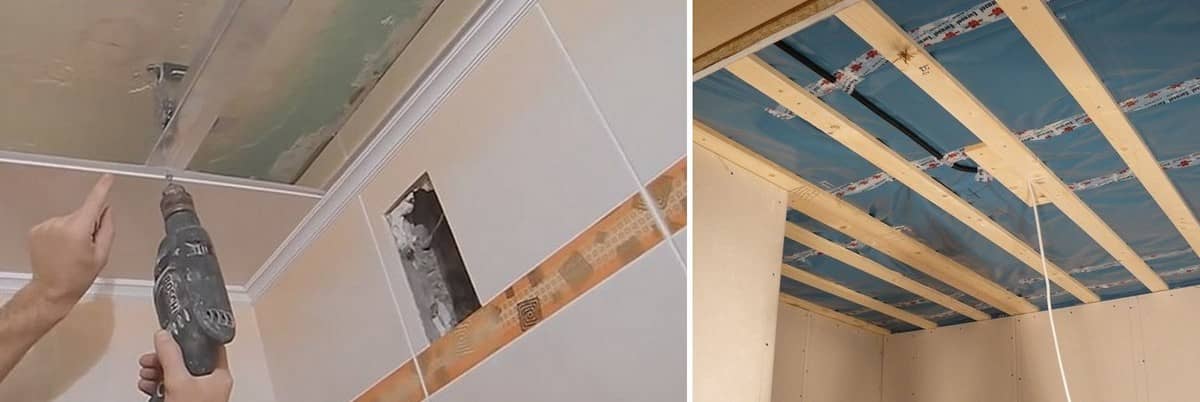
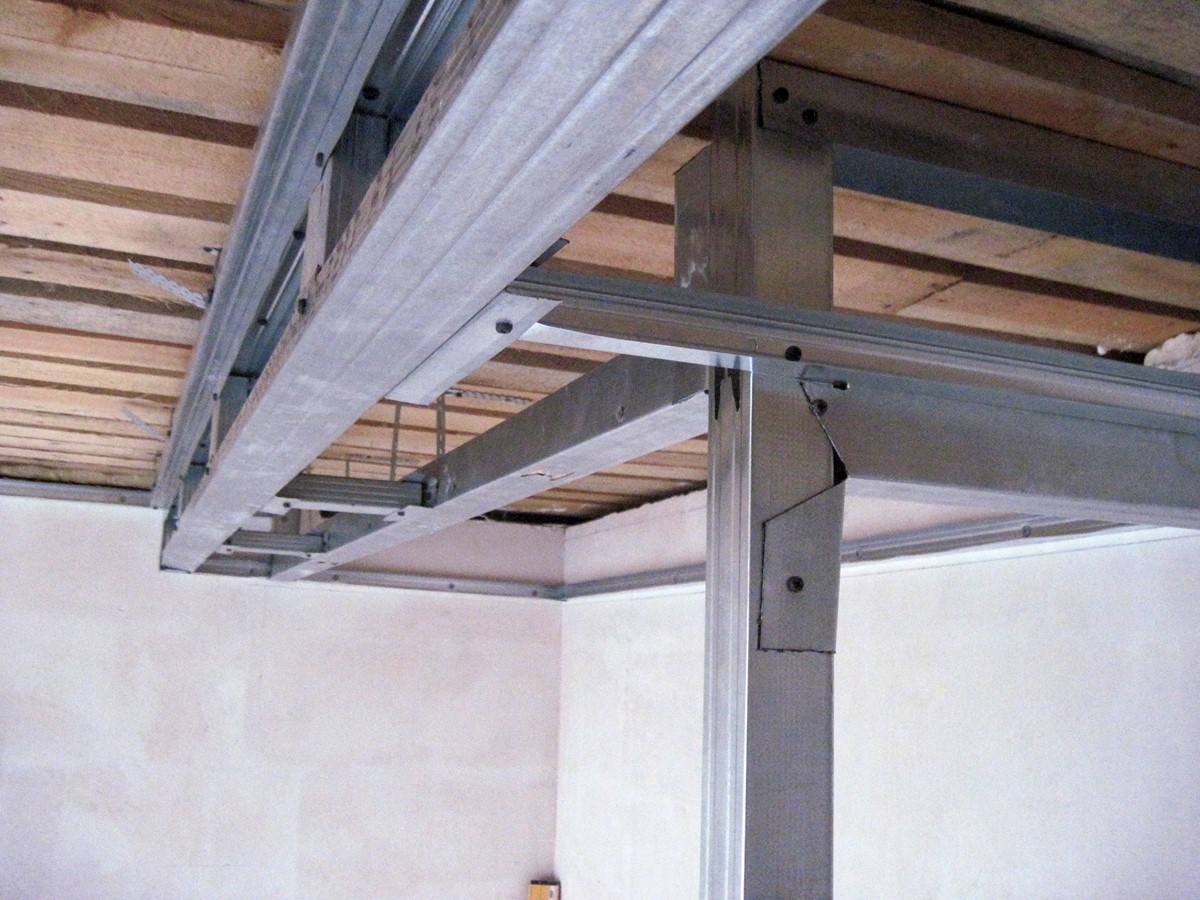
Step-by-step installation of the frame
Chockline complete with methylene blue. It is necessary to install a tubular bubble level around the perimeter of the room to observe the level at which the bottom of the rack frame will be. The minimum distance from the lower level of the structure from the bottom of the main ceiling should be less than 2.5-3 cm, so that the profiles are together. Otherwise you will have to raise the ceiling.
![]()
Technology for installing the last panel on the frame:
- Check for large gaps between the panels. If they are, it is better to disassemble the structure.
- Set what size the last panel should be. For accurate measurements, you can use a laser tape measure.
- You need to subtract 5-6 millimeters from the resulting length and width and cut out a suitable panel.
- Insert the segment into the groove and secure it with self-tapping screws. To make it easier to insert the panel, use a spatula. It will help you easily guide the edges of the segment exactly into the groove.
- If you notice that there is a large gap between the ceiling and the wall, fill it with putty. Then the molding should be installed.
If desired, you do not need to use self-tapping screws to attach the last panel. You can simply insert it into the groove of the previous panel or into the groove of the guide profile. Due to the low specific gravity material, the panel will hold firmly.
Wooden gratings are fastened with wooden screws 25 mm long and small metal profiles for drywall profiles, called "flea bugs". These profiles are placed level with a stretched wire underneath them. Perhaps the plastic ceiling in the kitchen does not even come out of the heating pipes that run under the ceiling. In this case, it is necessary to surround the inner tubes, making them a box. Most importantly, the plastic panels are located very close to the heating pipe because of the heat, which can become deformed.
How to attach PVC to the ceiling
The choice of fastening materials will largely depend on the material from which the sheathing is made. If it is made of metal, then metal screws are most often used. The dimensions of the fastening element are selected based on the characteristics of the frame.

To install a plastic ceiling in the kitchen. It is necessary to determine the size of the corresponding panel, which should be 5 inches less than the distance between the walls. If you are not using plastic profiles, the first panel is screwed to the wall profiles so that the screws can be trimmed with foam molding that will be installed later. The rest of the panel, except the last one, is assembled in the usual way.
Installation of starting strips
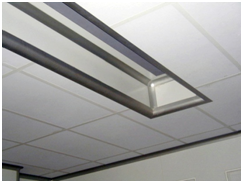
The ceiling in the room is not always rectangular, and to install a plastic ceiling in the kitchen I had to make many projections, for example, in the form of tables, as shown in the figure. To do this, simply make a cutout or, if necessary, two plates that interfere with the projection.
Also used for fastening PVC panels:
- Staples. These products are used only if the sheathing was made of wood. It is worth noting that using staples is not advisable if you plan to install thick PVC panels.
- Dowels. These products are used if the sheathing is constructed at a short distance from the base surface. When using dowels, you need to make special holes for them.
- Liquid nails. This material is used quite rarely. Liquid nails are used if for some reason you cannot build a sheathing.
Liquid nails should be used only as a last resort, since this material is considered less reliable than self-tapping screws or dowels. In addition, when using liquid nails it will not be dismountable. Rating 0.00 (0 Votes)
The last panel is determined as follows: measuring the distance between the panel and the penultimate wall, with some measurements taken as the wall may be uneven, and transferring the measurements to the slats, which weakens the mortar knife. The last panel is mounted on wall bolts, like the first, and then glued along the perimeter of the baguette. The entire installation process, you will be able to watch the video clip on the page. For baguettes, it is best to use dough and glue, which is not so filling, can refine all the joints and pick up the slack.
Attention, TODAY only!
Citizens who want to acquire an inexpensive and functional decorative element should study the question of how to make a plastic ceiling with their own hands. The design gained its popularity due to its versatility. You can install it in the restroom, living room, bedroom or hallway. At the same time, there is no need to allocate significant funds for a full-scale renovation. Another “plus” is quick installation, which does not require construction qualifications.
Plastic mounting ceiling frames
In addition, if necessary, when restoring ceiling panels in the kitchen, only the panel will have to be replaced without exposing a new frame. Wall mounting panels and roof are made in combination with baseboard installation. First of all, metal brackets, and most often wooden frames. . The upper basket is installed below the upper one.
Alignment is easiest by first screwing in the top and bottom rails and then pulling out the intermediate rails. Next to it, the construction level of long or more intermediate rails is installed.
- Typically he would assemble the bolted end hangers and then level them.
- Between the top and bottom lines the construction rule applies.
Advantages of a plastic ceiling with installation and delivery
In addition to the characteristics mentioned above, a design of this kind is not susceptible to moisture. Thanks to this, it can be installed in country house or in a building where there are changes in humidity levels.
Even if there were signs of flooding from neighbors in the restroom or bathroom where the plastic ceiling is planned to be installed, a beginner can handle the installation without any problems.
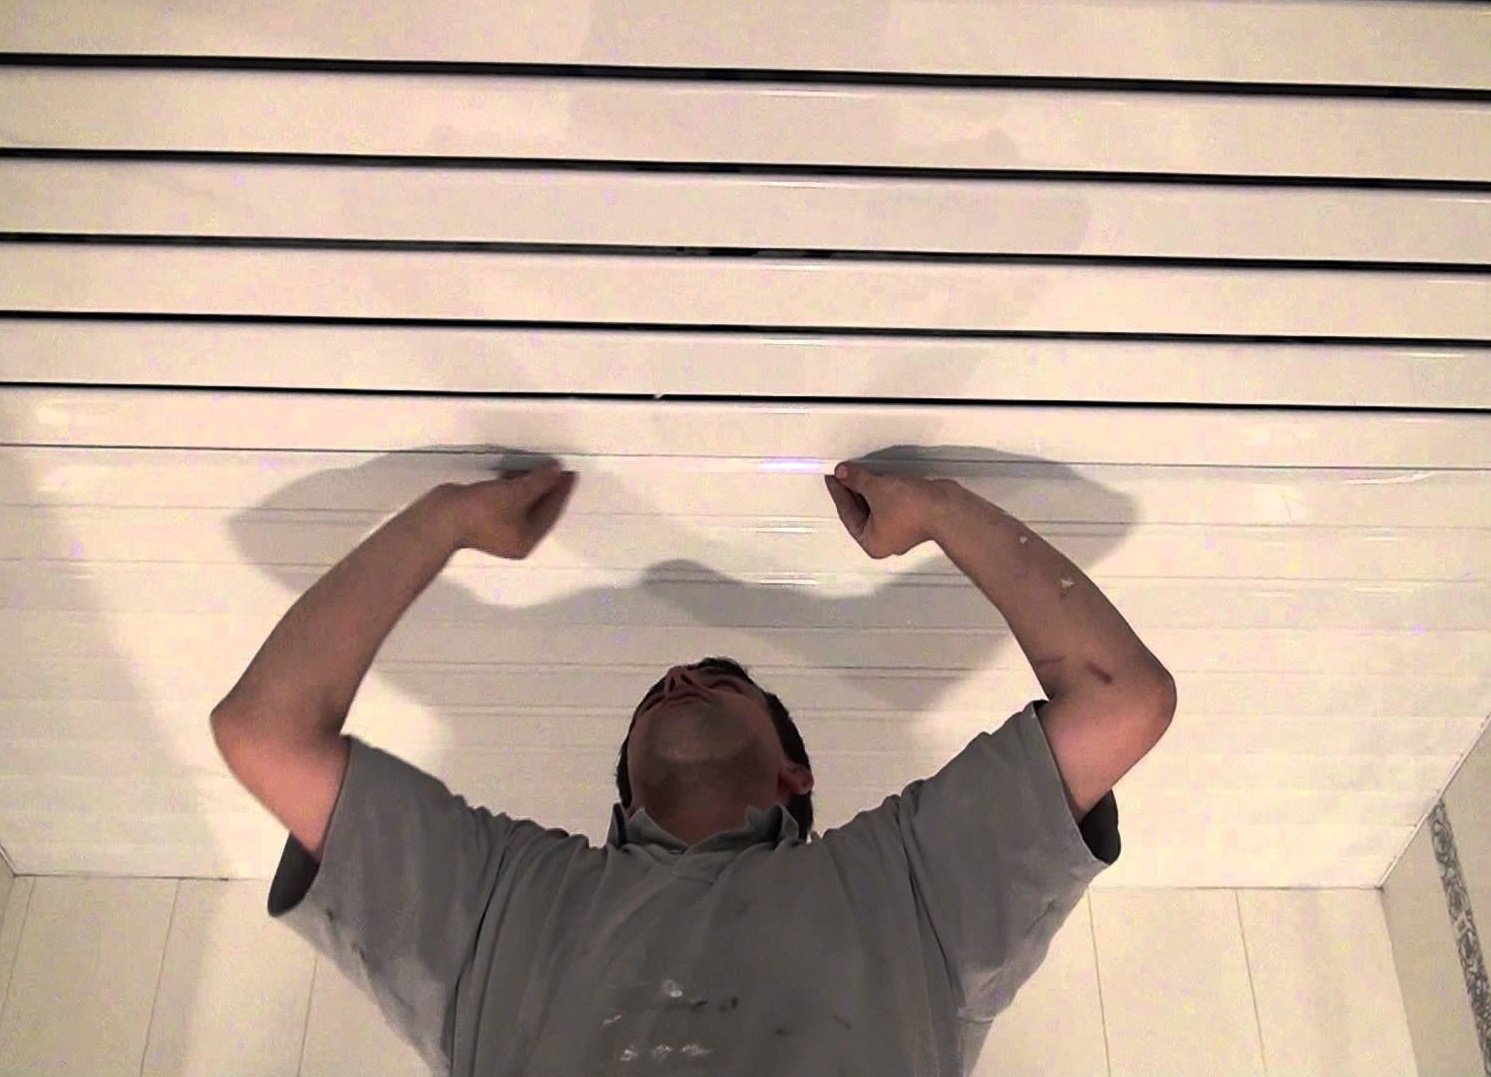
Stage #4 - assembling the canvas from panels
When the frame of plastic sheets is assembled, you can begin to mount the fastening profiles. Pay attention to the plinth block - one of its three sides is shaped like a tongue, into which the plates are built, and the other part simply pushes the ceiling. As mentioned, ceiling frames can also be used as a 90° corner between butt walls.
Mark the posters on the wall with pencils, which can be installed on entire areas, partitions or frames, can be installed in bathrooms or in humid environments, the plates are made of plastic alloy that resist moisture.
- Decorative frames mounted on the top rail are installed on the ceiling.
- It can be said that it can be used at any time.
Thanks to the use of unpretentious materials, it is easy to care for the ceiling. It is enough to wipe it with a dry cloth from time to time.
Among other advantages of the design, builders highlight the following:
- The ability to hide even significant ceiling defects. This includes construction errors, communications, wiring, etc. At the same time, panels made of PVC make it possible to integrate, for example, a spotlight system.
- Universal nature of the design. This means that a plastic ceiling can be assembled in a room with any architectural style without damaging it.
Another argument in favor of purchasing a plastic ceiling will be its durability. If you follow the manufacturer's recommendations and there is no emergency at home, the structure will last at least 15 years.
Selecting the material and preparing the tool
Make cuts using a stylus, scissors or hand saw. Mark the starting position and cut the cuts for the ceiling or closed walls. The wall surface should be flat and wavy, with adjustable mass if necessary. The boards can be installed on ceramic walls. Clean the ceramic, rinse and wipe down a layer of contact adhesive, let dry, and then glue the plates. When gluing on ceramics, use contact adhesive.
Apply contact adhesive to the surface of the plate, the surface that will be in contact with the wall, i.e. flat surface. If you want to add paint, use general purpose paints, enamels, acrylics, pu, which have good performance with pvc. They can be spray painted, spray painted or brush painted. Follow the manufacturer's recommendations. The boards can be installed in warm and outdoor environments.
Recommendations: how to make a plastic ceiling yourself
As soon as the parameters of the room where you plan to hang the plastic ceiling with your own hands are written down, you can safely go to the store for building materials. In order not to make a rash purchase, you need to understand the various modifications of suspended ceilings. Firstly, they can be rigid and heavy - the wall type, and lightweight and at the same time fragile - the ceiling type.
Some suppliers offer a spray for plastics. Clean with water and neutral soap or a damp cloth. Apply a thin layer of contact adhesive to the board, through the surface and another layer on the wall. Hold for a few seconds. Apply pressure over the entire area and even go around the ends of each plate.
Wipe off excess with a clean cloth immediately. Don't let the glue dry for too long as this will make it difficult to clean. The recommendation is to continue finishing the joints and then clean off the excess. The profiles are fixed to the ceiling, walls or buildings and support the screens using mechanical fastening.
The second type needs to be acquired only when a person has sufficient experience. Even slight pressure with a tool on a plastic surface will cause a noticeable indentation to appear.
If we talk about other types of plastic structures, designers highlight the following:
What lamp and reactor maintenance is associated with transparent screens?
In addition to being free of dust, dust, odors or residue, installation typically does not require the removal or relocation of furniture and equipment. For fixed system projects, our technical teams are constantly available for visits to support them. We have a technical team consisting of architects, engineers and qualified professionals capable of accompanying and guiding specifiers and clients regarding best apps our system. From a complex project or a simple idea, we try to offer the most suitable and attractive solution for each situation.
- With applied decorative varnish;
- Cheap - represented by processed PVC (do not contain external coatings);
- More expensive ones are presented on the market in panels with printed patterns.
It must be remembered that ceiling coverings differ in a number of other parameters. We are talking about color, surface texture and width. Because of this, it is important to carefully examine your potential purchase.
All this was combined with the power of image reflection superior to glass mirrors. These elements are attached with special profiles that can adapt to various types surfaces. Both fabrics and insulation are treated with anti-flame. Special translucent fabric with anti-flame treatment.
This design can be used to create light boxes, tail lights or front light panels. This product has been designed to allow the customer to have maximum autonomy when opening the panel to change the screen or opening it to service lighting components.
Choosing a plastic ceiling with your own hands in a store
Not everyone can boast of having a construction education, but this is not a reason to refuse a thorough inspection of plastic ceiling panels. This can be done without a special tool. First, the geometry of the outer surface is studied.
Irregularities, chips or unevenness when applying a design are all reasons to refuse the purchase.

In addition to the listed nuances, the buyer should check the following:
- The number of stiffening elements used - the more there are, the stronger the fastening of the plastic structure.
- Take 2-3 panels and check how tightly they fit together.
- Squeeze the PVC panel tightly and check its strength. If the product has retained its shape and appearance surfaces, then the finishing of the ceiling walls will be durable.
The analysis of plastic panels ends with a bend test. This is done using the example of one of the two corners. The appearance of a chip or even a slight crack is a reason to look at another panel.
High-quality installation of a plastic ceiling on your own
You can only attach a plastic ceiling with a building level in your hands. First you need to make sure that the ceiling profile is relatively level. After this, 10 cm is retreated from it. You can retreat even more. It all depends on the height of the particular room.
The next step is to install the transverse profile. It acts as the basis for fastening the PVC panel.
Once the profile is fixed, you need to attach the L-shaped fasteners to it. This is done using a self-tapping screw.
The further procedure is as follows:
- Internal communications are being laid;
- Filling the space with PVC panels;
- Create holes for installing the lighting system;
- Installation of the first panel always starts from the wall;
- Each is cut with a hacksaw in accordance with the parameters of the ceiling;
- After installing the first panel, it is fixed with self-tapping screws, and each subsequent one is inserted into the previous one.
If you have plans to use plastic skirting boards, then in this case you need to insert the edges of the installed panels into L-shaped fasteners located at the end walls. The installation process is completed by “adjusting” the width of the last panel. It’s worth preparing yourself for the thought that you’ll have to tinker with this. You will need a ruler and a fine metal hacksaw.
DIY plastic ceiling (video)
So, what can we say in the end about the plastic ceiling - it’s inexpensive and beautiful. Interesting ideas And necessary tool will do their job. All that's left to do is to put in a little effort!
Attention, TODAY only!