- Pros and cons
- Preparing the walls
- Preparatory stage
- Wallpapering walls
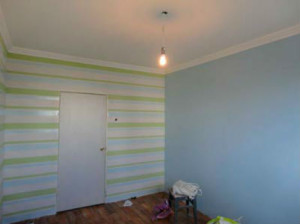
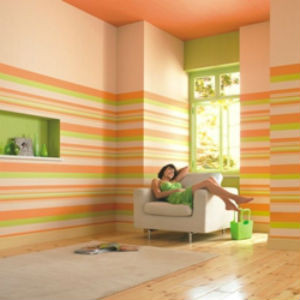
Among internal finishing works The most common and popular is wallpapering walls. To achieve original design, possible horizontally. In this case, the interior of the room stands out either due to alternating patterns, or color range canvases, or simply by alternating the sheets themselves.
The advantage of horizontal wallpapering is that repairs performed in this way give the room a unique design.
Pros and cons
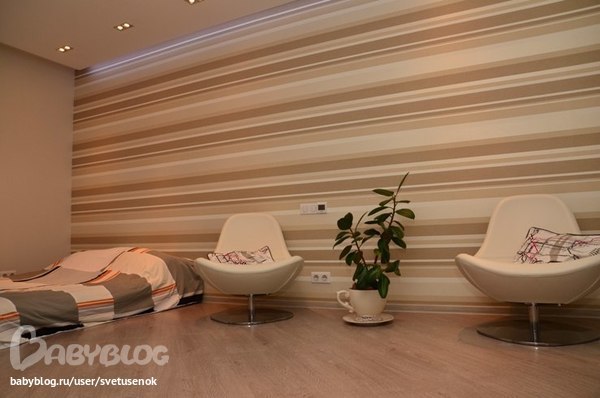
When planning to renovate an apartment, many people wonder whether it is possible to hang wallpaper horizontally rather than vertically. Yes, they can be glued horizontally. This gluing option has its advantages and disadvantages. The advantage is that repairs performed in this way give the room a unique design. At the same time, there is no limit to the flight of imagination.
The disadvantages include:
- This process is quite complex and cannot be done on your own without any help. A partner must be present and help.
- Wallpapering in a horizontal position should only be done on carefully leveled surfaces, since any curvature on the walls will immediately catch the eye.
- If the wallpaper is thin or paper-based, then when smoothing it with a roller or other improvised means, you can tear it. Therefore, you should be careful at this stage of work.
- If the joints of vertically glued wallpaper are invisible, then with horizontally glued wallpaper artificial lighting the joints are more visible.
If the originality of the interior, which will be obtained in the room after wallpapering the walls horizontally, outweighs all the difficulties during the renovation, then you can begin to transform the house.
Return to contents
Preparing the walls
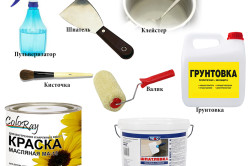
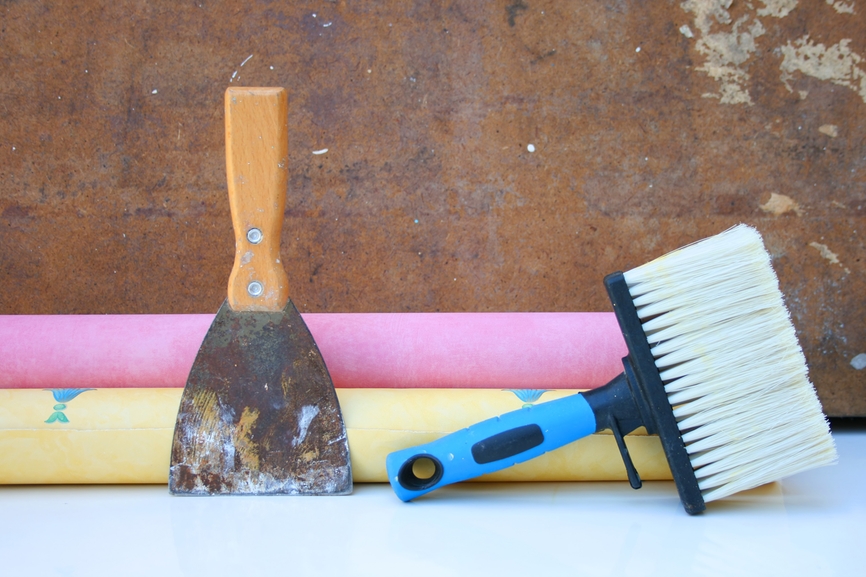
You will need:
- spray;
- spatula;
- paste;
- oil paint;
- brush;
- roller;
- putty;
- primer.
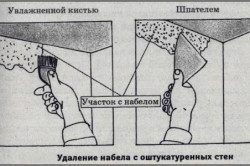
Is it possible to glue wallpaper on an unprepared wall surface? In no case, first it must be carefully prepared. If there are old wallpapers left on the surface, they need to be removed. To do this, use a spray bottle to spray not too hot water on them and leave them to soak for a while. After this, they are easily removed using a metal spatula. If the walls are painted oil paint, then they are washed hot water with the addition of soap or soda.
To apply wallpaper to oil paint, use flour or starch pastes. To do this, paint is applied in strips about 5 cm wide to the surface of the walls from above, below near the baseboards, around window and door openings. It is best to leave everything until completely dry after painting the first layer, then paint it with a second layer and dry it. Next, the strips are wiped with a solution soaked in hot water with a rag and sanded with sandpaper. At the end, all areas and corners of the room painted with oil paint are coated with paste.
If the room has interior partitions made using dry plaster, plywood, plasterboard, etc. then they need to be prepared first. To do this, the joints of sheets or slabs are cleaned, puttied, and painted with oil paint. Or the seams are sealed with gauze, which is puttied, cleaned and painted with oil-based paint. The heads of screws or nails, for example, on plywood, need to be deepened further so that they are immersed in the sheet. Then these places are lubricated with drying oil, oil paint, putty and cleaned.
All irregularities, holes and cracks are sealed with putty. To do this, the first step is to fill the cracks and voids using a small spatula. After the treated areas have dried, the entire surface of the wall is leveled with putty. At this stage of work it is necessary to use a building level. Next, a primer is applied to the dry wall in 1-2 layers using a brush and roller, which is necessary for better adhesion of the surface and wallpaper. The prepared wall should be flat, smooth and dry.
Return to contents
Preparatory stage
You will need:
- roulette;
- pencil;
- construction or laser level.
Before you start gluing wallpaper on the wall, you need to calculate its quantity. To do this, determine the area of the room by multiplying the height of the wall by the width. In this case, the height of the room is measured from the floor skirting boards to the ceiling moldings. Then a sketch is made, which takes into account all the nuances near window and door openings, as well as near pipes and heating devices. After this, a decision is made on where it is better to start and how to hang the wallpaper so that everything turns out beautifully and neatly.
Nowadays, many rooms have built-in wardrobes and fireplaces. If the wallpaper has a pattern, then in order for it to match, you need to start gluing the wallpaper on exactly one side of the cabinet or fireplace. To combine the pattern on the canvas, two rolls are unrolled, and the pattern is combined either transversely, or diagonally, or it does not need to be combined. If alignment is necessary, when gluing the strips, you need to change their direction, and in order not to get confused, the top of each canvas is marked with a simple pencil.
In order for the wallpaper to be glued horizontally evenly, mark the distance from the lower plinth at a height of 10-12 mm and draw a horizontal line using a level or level. It is along this line that the side of the panel will be placed. Then the roll is applied to the wall in a horizontal position and the best match of the pattern is selected. To do this, first move it to one side, then to the other, until the optimal result is obtained.
To mark the canvas before cutting, the roll is applied horizontally to the wall, to the drawn line or to the upper edge of the glued piece. Next, combining the pattern, mark lines on both sides for cutting. If the walls are uneven, the wallpaper is trimmed slightly at the joints, and the cutting location is marked on the canvas with a pencil.
When renovating a room, wallpapering walls is very popular. Sometimes, in order to highlight the interior of a room through a pattern on the wallpaper or alternating sheets, they resort to horizontal wallpapering.
But in order for the result to satisfy expectations, you need to decide on such actions as:
Calculation of the number of wallpapers
To determine the area of the walls, you must use the formula S=A B. Make a sketch of the walls. Taking into account all the nuances near windows, doors, pipes. You should definitely measure the height of the rooms, starting from simple baseboards to ceiling plinth. The height of the rooms should be multiplied by their width. This will be the area. You should take the sketches with you to the store and the sellers themselves will be able to calculate everything correctly.
Plan for horizontal wallpapering
Look around the room and decide where to start gluing the wallpaper horizontally. You should take into account the coincidence of patterns on adjacent pieces of wallpaper. This is allowed in corners and behind doors. If the room has a fireplace or built-in closet, then wallpapering should begin on one side of the closet or fireplace. In this case, pattern mismatch will not occur.
Combination of drawings (patterns)
 Unfold two rolls of wallpaper to check the pattern alignment. There are three combination methods:
- transverse;
- diagonal;
- a method that does not require combination.
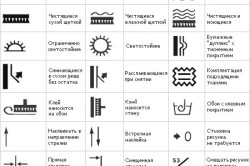
The combination of patterns determines the method of cutting rolls and sticking wallpaper. It’s worth looking at the labels on the roll with patterns. If the wallpaper pattern does not require matching, the roll will be marked “reverse”. If there is alignment, then the direction of the stripes when sticking must be changed. You should immediately mark the top of each canvas on the panel.
Aligning the wallpaper horizontally
The first panel should be glued from doors or windows to the corners. It is necessary to mark a horizontal line with a level or level, which is located at a distance of 10-12 mm from the lower plinth. The side of the panel should be placed along this line. The line is drawn with a pencil.
Panel measurements and his circumcision
 You should look at the patterns and decide where they start. Place a roll of wallpaper horizontally against the wall, and moving it from left to right, you should look for the best match of patterns.
Since walls are often uneven, you will have to trim the wallpaper a little at the joints. All subsequent horizontal rows of wallpaper go along the upper edge of the previous, already pasted canvas. The place where the blade is cut must be marked with a pencil.
Applying glue to wallpaper and gluing walls
Prepare glue, there are instructions for this. Place the panel so that it lies face down. On a previously placed polyethylene film. Apply glue using a roller or brush from the central part of the canvas to the edges. Next, you should fold the panels correctly. This must be done to prevent rapid drying. Five minutes after the glue has soaked the base, you can glue the wallpaper horizontally on the wall.
Horizontal wallpapering cannot be done independently. This kind of work should be done together with a partner.


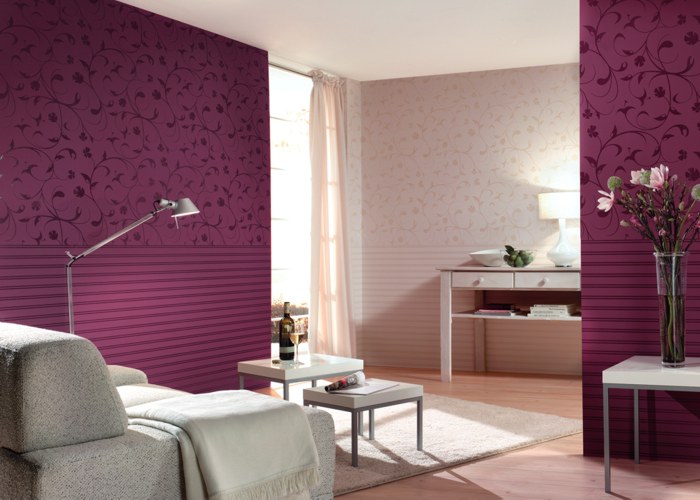
Wallpaper is a universal finishing material that is widely used to decorate walls in both residential and office spaces. One of the most common ways to decorate walls with wallpaper is the horizontal version of wallpapering. Let's consider whether it is possible to glue wallpaper horizontally.
Before you start gluing wallpaper horizontally, you should first decide on the choice of a certain type of wallpaper, calculate the required amount finishing material, designate a plan for pasting, and also prepare everything necessary tools for work.
Calculating the amount of wallpaper and drawing up a horizontal gluing plan
In the process of calculating the required amount of wallpaper, it is necessary to measure the height of the room, from floor skirting boards to ceiling ones. After this, you should multiply the height of the room by its width. As a result, you will get the area of the room. If you draw a sketch of the room on paper, taking into account all the hard-to-reach places, when you buy wallpaper in a store, you can show it to the seller, who will help you decide on required quantity material.
To draw up a detailed plan for horizontal wallpapering, first of all you should carefully examine the room and decide on which side you will start gluing the wallpaper. In this case, it is necessary to take into account the coincidence of the pattern on adjacent wallpaper sheets, especially in corners and behind doors. If the room has a built-in closet or, say, a fireplace, it is recommended to start wallpapering on one side of the fireplace or closet. This nuance will help to avoid pattern mismatches.
Combination of drawings (patterns)
To match the pattern applied to the coating as accurately as possible, two rolls of wallpaper should be unrolled and checked how the pattern fits together.
There are three main methods of combining patterns on wallpaper: diagonal, transverse, and a method that does not require registration.
The choice of a specific method for combining patterns directly depends on the method of cutting the rolls and applying them to the surface of the walls. The necessary information can also be found on the label of the roll of wallpaper with a pattern. The mark “revers” indicates that this type of wallpaper will not require combining patterns. If there is still a need to combine the pattern, then during the gluing process it will be necessary to change the direction of the stripes. The first thing to mark on each strip is the top of each canvas.
Applying glue to wallpaper and gluing walls
After marking the walls, you need to prepare the adhesive composition using the appropriate instructions. Then the first panel should be placed so that it lies face down on the previously placed plastic film. Apply glue to the wrong side of the canvas using a brush and roller, distributing it from the center to the edges of the canvas.
After five minutes from the moment of applying the glue, when it saturates the base of the material, you can begin horizontal gluing.
It should be noted that horizontal gluing must be done together with a partner.
Having raised the panel to the required height, first of all you need to try to glue the middle, and then disperse the air to the edges. To do this, you can use a roller or a special wing. In this case, you should carefully monitor the alignment of the pattern.
To smooth the seams, you can use a special roller made of plastic, which must be used to carefully roll the seams along the entire length so that they are not visible later.
After the glue has dried, you can begin cutting off the remaining wallpaper near the windows and in the corners. All windows in the room to be covered must be closed during the work.